Can I Use Any Backpack for Hiking (Pros, Cons, and Tips)

Can I Use Any Backpack for Hiking

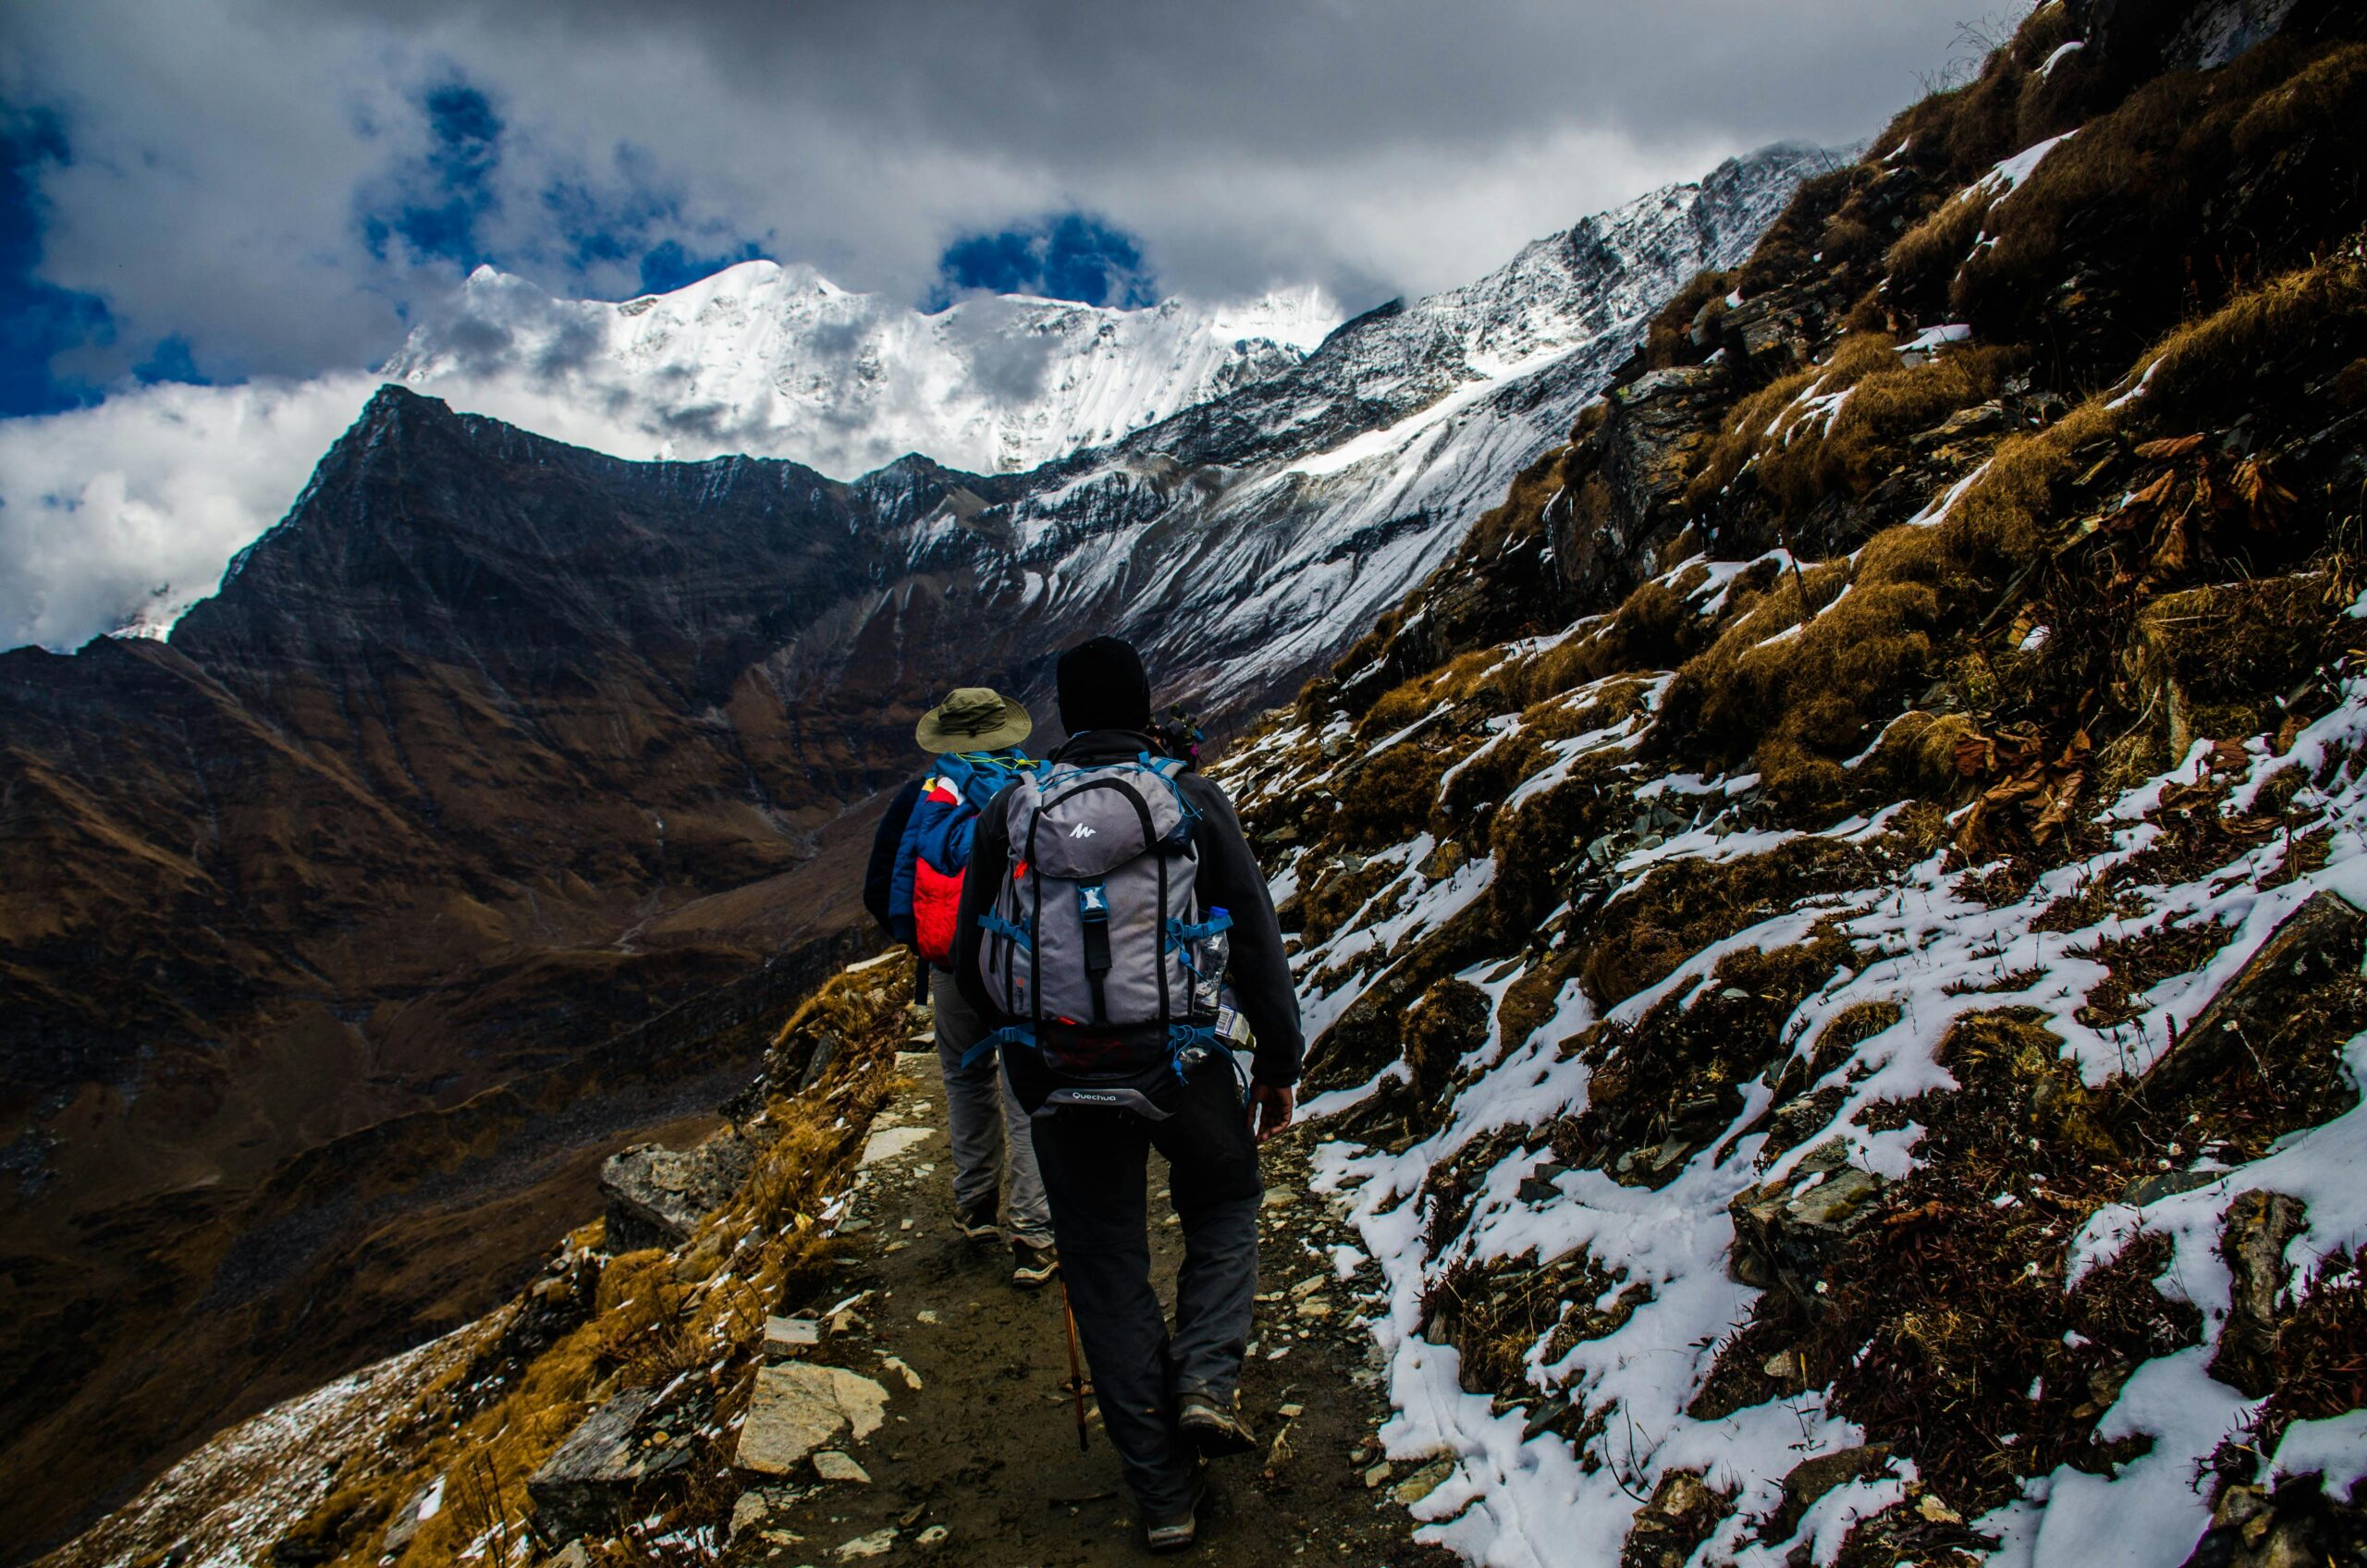
Can I Use Any Backpack for Hiking? Yes, you can technically use any backpack for hiking, but it’s important to know that doing so might not provide the best experience on the trail. While a regular backpack might get you through a short and easy hike, it generally lacks the features and design elements that make hiking enjoyable and safe, especially over longer distances or on challenging terrain. Let’s explore why hiking backpacks are specifically designed for outdoor adventures and how they differ from regular backpacks. Read more: Why Do You Need Hiking Socks? What is the Difference Between a Regular Backpack and a Hiking Backpack? Regular Backpack and a Hiking Backpack Feature Regular Backpack Hiking Backpack Comfort Basic padding, may cause discomfort over long hikes Ergonomic design with padded shoulder straps and hip belts for added comfort Weight Distribution Weight rests mostly on shoulders Balanced across hips and back, reducing strain Support Minimal or no internal support Internal or external frames provide stability Durability Made for light, everyday use Built from rugged, weather-resistant materials Weather Resistance Usually not water-resistant Often water-resistant with additional rain covers Storage and Organization Limited pockets, few compartments Multiple compartments, hydration sleeves, and gear loops Ventilation Minimal or no back ventilation Ventilated back panels to reduce sweating External Attachments Typically none Loops and clips for attaching poles, sleeping bags, and other gear Best For Daily use, light carrying, short commutes Long hikes, heavy loads, multi-day treks Can I Hike With a Normal Backpack? Certainly, you can hike with a normal backpack if: The Hike is Short and Simple: If you’re heading out for a quick jaunt on an easy trail, a regular backpack might work without much fuss. The Terrain is Mild: For flat paths and gentle inclines, a regular backpack can suffice without too much discomfort. However, as hikes become longer or more strenuous, a regular backpack can quickly show its limitations. Without the right support and comfort features, you could find yourself facing aches and pains that detract from your enjoyment of nature. What Makes a Good Regular Backpack for Hiking? If you’re thinking about using a regular backpack for hiking, it’s essential to consider some key features that can help make it more suitable for the trail. While it won’t have all the perks of a true hiking backpack, a good regular backpack should ideally have: Comfortable Straps: Look for padded shoulder straps to reduce the strain on your shoulders, especially if you’re carrying a bit of weight. Breathable Back Panel: Some regular backpacks come with a mesh or lightly padded back panel, which can help keep you cooler by allowing air to circulate between your back and the bag. Multiple Compartments: More compartments can help with organization, allowing you to keep essentials like water, snacks, and navigation tools within easy reach. Durability: Opt for a backpack made of stronger materials like nylon or polyester. This won’t match the durability of a true hiking pack, but it should hold up better on trails than more delicate fabrics. Water Resistance: If you expect to encounter any moisture, a water-resistant backpack—or even a simple rain cover—can go a long way in protecting your gear. Is a Hiking Backpack Worth It? Investing in a hiking backpack can be beneficial for many reasons, particularly if you plan to hike more often or tackle more difficult trails. Here’s what makes hiking backpacks a worthwhile consideration: Enhanced Comfort: Hiking backpacks are designed for long-term wear, with padded shoulder straps and hip belts that help distribute weight evenly. This comfort can make a significant difference, especially on longer treks. Better Weight Distribution: A hiking backpack is engineered to shift the weight away from your shoulders and onto your hips. This balance reduces fatigue and makes it easier to navigate uneven terrain. Durability for the Trail: Hiking backpacks are constructed from tough materials designed to withstand the rigors of the outdoors. This durability means you won’t have to worry about your pack tearing or failing mid-hike. Weather Protection: Many hiking backpacks feature weather-resistant fabrics or built-in rain covers to keep your gear dry, making them much more reliable than regular backpacks in unpredictable weather. Organized Storage: With designated pockets for water bottles, snacks, and gear, hiking backpacks help keep your essentials organized and easily accessible, which can save time and frustration on the trail. Why Regular Backpacks Might Not Be the Best Choice for Hiking While a regular backpack may work for light, casual outings, here are some reasons it might not be the best option for hiking: Lack of Comfort Features: Regular backpacks often don’t have the same level of padding or ergonomic design, leading to discomfort over long distances. Poor Load Distribution: Regular packs don’t typically distribute weight effectively, leading to strain on your shoulders and back. Limited Storage and Access: The organization in regular backpacks is often insufficient for hiking needs, making it harder to find gear quickly while on the move. Insufficient Durability: Regular backpacks can tear easily on rough trails or in wet conditions, which is a significant risk if you’re serious about hiking. Weather Vulnerability: Most regular backpacks are not designed to handle moisture, leaving your gear exposed to the elements during a rainstorm. Choosing the Right Hiking Backpack If you decide to invest in a hiking backpack, here are some key features to look for: 1. Capacity Daypacks (15-30 liters) are ideal for short hikes. Multi-Day Packs (50-80+ liters) are suited for longer excursions with more gear. 2. Ventilation A pack with a ventilated back panel helps keep you cooler and reduces sweat buildup. 3. Padded Straps and Hip Belts These features ensure that the weight is distributed evenly, providing greater comfort. 4. Hydration Compatibility Look for packs that accommodate hydration bladders for easy access to water. 5. External Attachments Loops and straps allow for convenient attachment of extra gear like trekking poles or sleeping bags. Final Thoughts: Can I Use Any Backpack for Hiking? In summary, while you can use any … Read more
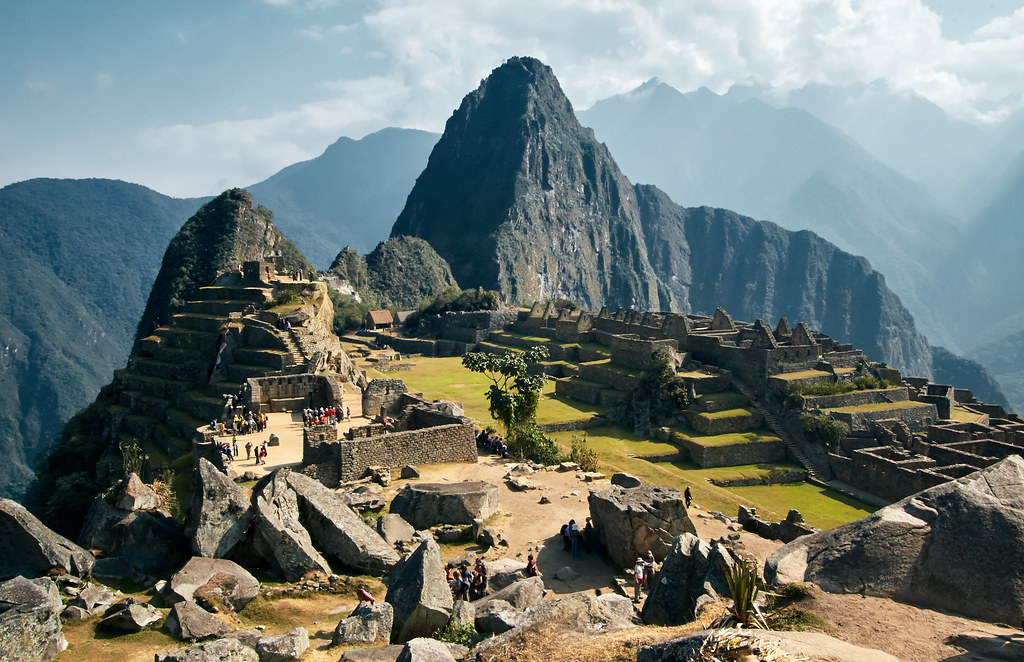
Why hike machu picchu (5 Reason)

Why hike machu picchu

Why hike machu picchu (5 Reason) machu picchu Why hike Machu Picchu? It’s more than just a journey through mountains; it’s a step into history, culture, and the heart of nature itself. As you walk along ancient paths and gaze upon breathtaking views, each step leads you closer to Machu Picchu’s legendary ruins. You’ll experience why thousands are drawn to this iconic site every year, from the incredible Inca history and world-famous landmarks to the peaceful moments spent atop the Andes. Whether it’s the thrill of scaling the Inca Trail, meeting the local Andean communities, or simply standing at the Sun Gate with Machu Picchu below, hiking here is an unforgettable adventure. Why hike machu picchu machu picchu A hike to Machu Picchu isn’t just a trip. It’s a special journey filled with ancient history, beautiful nature, and chances for self-discovery. Here are the top reasons why hiking to Machu Picchu is a must-do, with clear details and landmarks that make this trip unforgettable. 1. Discover the History of Machu Picchu’s Ancient Ruins Sun Gate Why Go: Machu Picchu was built in the 1400s by the Inca civilization and is known as the “Lost City of the Incas.” Hiking to Machu Picchu gives you a chance to learn about this ancient place and see the incredible work of the Inca people. Places to See: Along the way, you’ll pass famous spots like the Sun Gate (Inti Punku), which was an entrance used by the Inca people. You’ll also see the Temple of the Sun, where the Incas honored the Sun God. The Sacred Plaza is another important area with the Intihuatana stone, a special rock the Incas used to study the stars. 2. Enjoy Amazing Mountain Views and Unique Nature Salkantay Trek Why Go: The trail to Machu Picchu goes through many different landscapes, from high mountains to thick forests. Every part of the hike shows the beauty of nature in Peru. Beautiful Places to Visit: On the Salkantay Trek, hikers cross Salkantay Pass, a very high point at over 15,000 feet. If you’re on the Inca Trail, you’ll pass Dead Woman’s Pass (Warmiwañusca), the highest point on this trail, with great views of the valleys below. Those on the Salkantay route can also see Lake Humantay, a bright turquoise lake surrounded by snowy mountains. 3. Challenge Yourself with the Inca Trail or Other Routes Inca Trail Why Go: Hiking to Machu Picchu is a challenge that feels rewarding. There are different trails to choose from, each with its own experience. The famous Inca Trail is a four-day hike with many Inca sites, while the Salkantay and Lares treks show different parts of the mountains. Trails to Choose From: Inca Trail: This four-day hike is known for its blend of nature and history, with sites like Runkurakay and Phuyupatamarca along the way. Salkantay Trek: A five-day hike that crosses Salkantay Pass and includes stops at beautiful places like Humantay Lake. Lares Trek: This route goes through traditional Andean villages like Cancha Cancha, where hikers can learn about local customs. Read more: Why Do You Need Hiking Socks? 4. Meet Andean People and Learn Their Culture Why Go: Hiking to Machu Picchu is also a chance to meet people who live in the Andes mountains and learn about their traditions and way of life. Many still speak Quechua, the language of the Incas. Cultural Stops: On the Lares Trail, you can visit villages like Huacahuasi, known for colorful handmade fabrics and friendly people. You may see locals making chicha, a corn drink, and even join in local celebrations. 5. Find Peace and Inspiration in the Mountains Why Go: Hiking in the Andes mountains gives you a chance to relax, think, and enjoy nature without distractions. Many people come here not only for the hike but also to feel peaceful and inspired. Special Moments: The quiet spots on trails like the Inca Quarry Trail help you feel closer to nature. Watching the sunrise over Machu Picchu from the Sun Gate or the Sun Temple is unforgettable, making you feel proud and peaceful. Shortest hike to Machu Picchu The shortest hike to Machu Picchu is the 1-Day Inca Trail, covering around 10 kilometers (about 6.3 miles) and usually taking between 6 to 8 hours. This trek follows part of the classic Inca Trail, offering a taste of the traditional route but without the need for extensive preparation or camping. It starts at KM 104 on the Cusco-Machu Picchu train line, the point where the short trail begins. 1. Starting Point – KM 104 Chachabamba ruins Location: The hike begins at Kilometer 104, a spot along the train line between Cusco and Aguas Calientes. Altitude: This starting point is around 2,100 meters (6,889 feet) above sea level. Special Site: The Chachabamba ruins – Right near the trail’s beginning, you’ll see these ancient Inca buildings, made of stone. The Incas likely used this spot for important ceremonies or as a checkpoint. Trail Conditions: The first part of the hike goes uphill but is not too hard, taking you into a thick, green forest called the cloud forest. 2. Hiking Through the Forest Plants and Animals: This forest is home to many orchids (colorful flowers), bromeliads (a type of plant), and birds, like Peru’s national bird, the Andean Cock-of-the-Rock. You might also spot hummingbirds and butterflies. Elevation Gain: The trail slowly climbs to about 2,650 meters (8,694 feet), giving you nice views of the river below and surrounding mountains. 3. Halfway Point – Wiñay Wayna Wiñay Wayna Location: About 5 kilometers (3 miles) from KM 104. Wiñay Wayna sits at around 2,650 meters (8,694 feet). Description: This ancient site has large steps, walls, and terraces built into the hillside. “Wiñay Wayna” means “Forever Young” in Quechua, the language of the Incas. It may have been a place for farming or worship. Rest Area: Many hikers stop here for a break and snack. It’s a good spot to take in the views of the valley and … Read more

Why Do You Need Hiking Socks? (A Guide to Comfort and Adventure)

Why Do You Need Hiking Socks

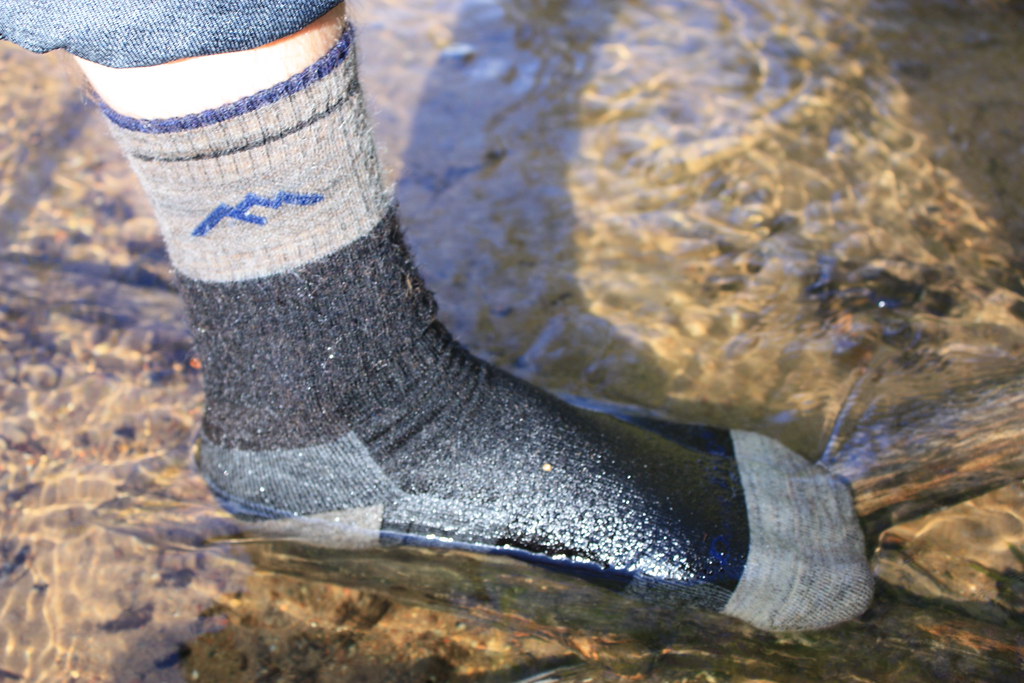
Why Do You Need Hiking Socks? A Guide to Comfort and Adventure hiking socks If you’re anything like me, you’ve probably wondered at some point, “Are hiking socks really necessary?” It’s a fair question, especially when you already have a pair of trusty sneakers and plenty of everyday socks in your drawer. But let me tell you, once you’ve experienced a long hike with the right socks, you’ll never go back to using your regular ones. Hiking socks are not just another piece of gear—they can make or break your day on the trail. Let’s dive into why they’re so important, what makes them different, and how to make the best choice for your feet. Why Do You Need Socks for Hiking? First things first, do you need special socks for hiking? Absolutely. While you could technically wear any socks you have, the difference in comfort and performance when you’re hiking can be night and day. Hiking socks are designed to protect your feet from blisters, wick moisture away, and provide extra cushioning and support where you need it most. Read more: Why You Need a Tent for Camping Regular cotton socks can leave your feet sweaty, which not only makes your feet cold in cooler weather but also increases the risk of developing blisters. Hiking socks, made from materials like merino wool or synthetic blends, are designed to keep your feet dry and comfortable no matter the conditions. Trust me—your feet will thank you. What Should Hiking Socks Be Made Of? What Should Hiking Socks Be Made Of One of the first things people ask is, “What should hiking socks be made of?” The short answer is: anything but cotton. Cotton holds onto moisture, and that’s a recipe for discomfort. Instead, look for hiking socks made of merino wool, synthetic fibers like polyester, or a blend of both. Merino wool: This is the gold standard for hiking socks. It’s soft, breathable, and excellent at wicking moisture away from your skin. Plus, it has natural odor resistance, which is a huge bonus when you’re spending hours—or even days—on the trail. Synthetic fibers: If you’re looking for something quick-drying and durable, synthetics like polyester and nylon are great options. They wick moisture away, dry faster than wool, and often cost a bit less. Both materials have their pros and cons, but the key thing is that they keep moisture away from your feet, reducing the chance of blisters. The Benefits of Hiking Socks Benefits of Hiking Socks Now that we’ve covered the materials, let’s talk about the hiking socks benefits. Why are hiking socks worth it? Here are a few reasons why they make such a big difference: Blister prevention: Hiking socks are designed with extra padding and seamless construction in areas where friction is most likely, like the heels and toes. This reduces the chances of blisters. Moisture management: We’ve already touched on this, but it’s so important. Dry feet are happy feet, and hiking socks excel at keeping your feet dry. Cushioning: Hiking socks often have extra cushioning in the footbed and around the ankles, which makes a huge difference when you’re covering long distances. Temperature regulation: Merino wool socks can keep your feet warm in cooler weather and cool in warmer conditions, making them a versatile choice for all-season hiking. Are Hiking Socks Worth It? So, are hiking socks worth it? 100% yes. Whether you’re heading out for a casual day hike or tackling a multi-day trek, the comfort and protection that hiking socks offer are invaluable. Blisters, sore feet, and damp discomfort can really take the joy out of a hike. Investing in a few good pairs of hiking socks is one of the best decisions you can make for your feet. Frequently Asked Questions about Hiking Socks I know socks might seem like a small detail, but when it comes to hiking, they’re a game-changer. So, let’s dive into some FAQs to address common concerns. 1. Should I wear two socks when hiking? This is an age-old hiking trick. Some hikers swear by wearing a thin liner sock under their regular hiking sock to reduce friction and wick away moisture more effectively. It’s definitely worth trying, especially if you’re prone to blisters. 2. What socks do you wear with hiking boots? You’ll want a sock that’s tall enough to prevent your boots from rubbing directly against your skin. Mid-calf or crew-length socks are usually the best bet, as they provide the right coverage and protection. 3. What kind of socks should you wear for hiking? As we mentioned earlier, merino wool or synthetic socks are ideal. Choose socks that are thick enough for the conditions (thicker for cold, thinner for hot), and make sure they offer cushioning in all the right places. 4. How should hiking socks fit? Your hiking socks should fit snugly, but not so tight that they constrict your circulation. You don’t want any excess material bunching up, as this can lead to blisters. Make sure the heel of the sock sits right where your heel is—no shifting around! 5. How often do you need to wash wool socks? Wool socks can be worn multiple times before they need washing, thanks to their natural odor resistance. On multi-day hikes, you can usually get away with wearing the same pair for a couple of days before washing them. 6. How long do hiking socks last? This really depends on how often you hike and the quality of the socks. A good pair of hiking socks should last anywhere from a few months to a couple of years if you’re hiking regularly. Just watch for signs of wear, like thinning in the heels or toes. 7. How often do you need to change your socks during a hike? If your feet get wet or start to feel uncomfortable, change your socks immediately. On longer hikes, it’s a good idea to bring an extra pair to change into halfway through the day. 8. How often … Read more

Why You Need a Tent for Camping (5 Reason)

Why You Need a Tent for Camping (5 Reason)

Why You Need a Tent for Camping (5 Reason) When you think about camping, one of the first things that probably comes to mind is the tent. I mean, where else would you sleep under the stars, right? But beyond just a cozy place to crash, a tent serves so many essential purposes during your outdoor adventures. Let me share why having a tent is a game-changer for camping trips, drawing from my own experiences along the way. Why You Need a Tent for Camping Protection from the Elements Safety from Wildlife and Bugs Privacy and Personal Space Comfort for Sleeping Portability and Flexibility Shelter from Wind and Dust Gear Storage Perfect for Multi-Day Trips Waterproofing and Ground Protection Emergency Shelter 1. Protection from the Elements Imagine setting up camp only to find out that a sudden downpour is headed your way. That’s where a tent really shines. Whether you’re dealing with rain, wind, or even those chilly mountain nights, a tent offers a protective barrier. I’ve used a 4-season tent, like the MSR Access, during a winter trip, and it felt incredible to know I had a safe haven from the biting wind and snow. Read more: Is trekking bag allowed in flight 2. Safety from Wildlife and Bugs Camping often means sharing your space with all sorts of wildlife. I once had a curious raccoon visit my campsite, and I was so glad to be inside my tent! It’s not just about larger animals; tents also keep out pesky insects that can ruin your experience. I love tents with fine mesh like the Big Agnes Copper Spur because they let in fresh air while keeping those annoying bugs at bay. 3. Privacy and Personal Space Let’s be real: camping can get crowded, especially if you’re in a popular area. A tent gives you that much-needed personal space. I’ve enjoyed many mornings sipping coffee inside my tent, feeling cozy while everyone else is still waking up. Tents like the REI Co-op Kingdom even have dividers, so you can create separate spaces if you’re camping with friends or family. 4. Comfort for Sleeping We all know that a good night’s sleep is crucial for enjoying the great outdoors. Sleeping on the hard ground? No thanks! With a tent, especially when paired with a quality sleeping pad, I’ve managed to have some of the most restful nights while camping. One of my favorites, the NEMO Dagger, has enough room for me to spread out and get comfortable. 5. Portability and Flexibility The beauty of camping is that you can go just about anywhere. Modern tents are lightweight and portable, making it easy to hike to your desired campsite without lugging around heavy gear. I once took the Zpacks Duplex on a long-distance hike, and I loved how it barely weighed anything, allowing me to enjoy the trek without the added bulk. 6. Shelter from Wind and Dust Camping in exposed areas like beaches or deserts can be challenging, especially with strong winds. I remember setting up my tent during a windy beach trip, and it felt amazing to have that shelter to retreat to while the sand whipped around. A sturdy geodesic tent, like the The North Face Mountain 25, really helps keep the wind at bay. 7. Gear Storage When you’re out in nature, keeping your gear organized is key. Tents often come with vestibules or pockets that are perfect for stashing backpacks, shoes, and cooking gear. I’ve found that the Kelty Late Start 2 has a great vestibule where I can keep my boots dry and out of the way when I’m hanging out inside. 8. Perfect for Multi-Day Trips If you’re planning to stay out for several days, having a tent is essential. It gives you a reliable base to return to after a long day of exploring. I once camped for a week in the Smoky Mountains, and being able to return to my tent each night felt like such a luxury after long hikes. 9. Waterproofing and Ground Protection Nobody wants to wake up in a puddle! A good tent with a rainfly is crucial for staying dry during unexpected downpours. I learned this the hard way on my first camping trip when I didn’t bring a footprint; my tent got soaked from the ground moisture. Now, I always use a waterproof tent like the Hilleberg Nallo 3, and it’s made a world of difference in my comfort level. 10. Emergency Shelter Life can be unpredictable, and having a tent means you’re prepared for whatever comes your way. Whether you find yourself stranded or face sudden changes in weather, a tent provides that essential shelter. On a recent hiking trip, I was grateful for my MSR Hubba Hubba NX, which offered me quick shelter when a thunderstorm rolled in unexpectedly.   Benefits of Using a Tent for Camping Using a tent while camping comes with numerous advantages that enhance your outdoor experience. Here are some key benefits: Weather Protection: Tents provide shelter from various weather conditions, including rain, wind, and sun. This protection allows you to stay dry and comfortable, regardless of the elements. Privacy and Comfort: A tent creates a personal space where you can relax and unwind. It offers privacy, allowing you to enjoy quiet moments away from the hustle and bustle of a campsite or group activities. Safety from Wildlife: Tents act as a barrier against wildlife and insects, keeping you safe from curious animals and pesky bugs. This added safety is essential, especially in areas with a lot of wildlife. Easy Setup and Portability: Most camping tents are designed for quick setup, allowing you to spend more time enjoying nature and less time preparing your campsite. Additionally, they are portable and easy to pack, making them convenient for any camping trip. Ventilation: Many tents feature mesh panels or windows that promote airflow, reducing condensation and keeping the interior comfortable. Good ventilation is crucial for a pleasant camping experience. Versatility: Tents come … Read more

Is Trekking Bag Allowed in Flight (Great Tips)

Is Trekking Bag Allowed in Flight (Great Tips)

Is Trekking Bag Allowed in Flight? Essential Guidelines for Travelers Planning an outdoor adventure often comes with a long checklist of gear and equipment to pack. One question that frequently arises is, “Is a trekking bag allowed in flight?” Understanding the rules and regulations surrounding travel with trekking bags is essential to ensure a smooth journey. Whether you’re flying to the breathtaking peaks of the Himalayas or embarking on a weekend hiking trip in the Rockies, knowing how to navigate airline policies can save you from last-minute hassles at the airport. In this comprehensive guide, we will explore the various aspects of flying with a trekking bag, including size restrictions, weight limits, packing tips, and security considerations. We will also answer common questions like whether trekking poles can be taken onboard and what to do if your gear exceeds the airline’s limits. With this information at your fingertips, you’ll be well-prepared for your next adventure. Can You Bring a Trekking Bag on a Flight? Yes, you can bring a trekking bag on a flight, but the specific rules depend on the airline you’re flying with. Each airline has its own policies regarding carry-on and checked baggage, and understanding these regulations is crucial for a hassle-free travel experience. General Airline Policies Most major airlines allow trekking bags, but you must ensure that they fit within the size and weight limits for carry-on or checked luggage. Some of the most popular airlines and their general policies include: American Airlines: Allows one carry-on bag and one personal item. The carry-on must not exceed 22 x 14 x 9 inches, and the weight limit is generally around 40 pounds for checked baggage. Delta Air Lines: Similar to American, Delta permits one carry-on bag with the same size restrictions and a checked bag limit of 50 pounds. United Airlines: Allows a carry-on size of 22 x 14 x 9 inches. Checked bags must not exceed 50 pounds in weight. Southwest Airlines: Offers two free checked bags, with each bag not exceeding 50 pounds. The carry-on must fit within the standard size limit of 24 x 16 x 10 inches. Ryanair: Has strict policies regarding carry-on luggage, permitting only small bags that can fit under the seat in front of you. Read more: should hiking shoes be light or heavy Importance of Checking Airline-Specific Guidelines It’s essential to check the specific policies of the airline you’re flying with before your trip. You can find this information on the airline’s official website or by contacting their customer service. Remember that fees and policies can change frequently, so verifying the latest regulations is crucial. What Size Trekking Bag Is Allowed as Carry-on Luggage? Dimensions of Carry-on Trekking Bags When it comes to carry-on luggage, size is a critical factor. Most airlines set strict dimensions for carry-on bags, and trekking bags must comply with these limits to be allowed on board. Generally, the maximum dimensions for a carry-on trekking bag range from 20 to 24 inches in height, 14 to 16 inches in width, and 9 to 10 inches in depth. This means that a typical daypack or smaller trekking bag with a capacity of 30-40 liters is often suitable for carry-on. Weight Limits for Carry-on Bags In addition to size restrictions, airlines also enforce weight limits for carry-on luggage. Most airlines allow carry-on bags to weigh between 15 to 22 pounds. It’s vital to check the weight of your trekking bag before heading to the airport. If your bag is too heavy, you may need to adjust your packing or consider checking the bag instead. Common Carry-on Trekking Bags If you’re in the market for a carry-on trekking bag, consider the following popular options that comply with airline regulations: Osprey Daylite Plus: A lightweight and versatile daypack with a 20-liter capacity, suitable for day hikes and travel. Patagonia Black Hole Pack: A durable 32-liter backpack that can fit most carry-on requirements. Deuter Speed Lite 20: A sleek and functional backpack with a 20-liter capacity, ideal for short hikes and city exploration. Are There Weight Limits for Trekking Bags on International Flights? When flying internationally, weight limits for trekking bags can vary significantly between airlines and routes. Understanding International Weight Restrictions Most international airlines follow a similar weight policy as domestic airlines, allowing checked bags to weigh between 50 to 70 pounds. However, some airlines may impose stricter limits, particularly for economy class travelers. For instance: Emirates: Generally allows checked bags up to 50 pounds for economy class, while business and first class can go up to 70 pounds. British Airways: Typically allows 51 pounds in economy class. Air Canada: Permits 50 pounds for international flights in economy. Additional Charges for Excess Weight If your trekking bag exceeds the airline’s weight limits, you may incur additional fees. These fees can range from $50 to $200 depending on the airline and the weight overage. To avoid these charges, weigh your bag before heading to the airport and make adjustments as necessary. Do Airlines Allow Trekking Poles in Checked Luggage? Guidelines for Packing Trekking Poles Trekking poles are essential tools for hikers, providing stability and support on uneven terrain. If you’re wondering, do airlines allow trekking poles in checked luggage? the answer is generally yes. Most airlines permit trekking poles to be packed in checked baggage, but they must be securely stored to avoid damage. Some airlines might have specific restrictions regarding the length of the poles, so it’s always a good idea to check with the airline before packing them. Trekking Poles in Carry-on Baggage While trekking poles are usually allowed in checked luggage, they are often not permitted in carry-on baggage. This is because they can be classified as a potential weapon. If you plan to travel with trekking poles, pack them in your checked bag to avoid issues at security checkpoints. Can I Bring a Trekking Backpack as a Personal Item on a Plane? Understanding Personal Item Regulations In addition to a carry-on bag, airlines often allow … Read more

Should Hiking Shoes Be Light or Heavy

Should Hiking Shoes Be Light or Heavy

Should Hiking Shoes Be Light or Heavy? When choosing hiking shoes, many people wonder if the shoes should be light or heavy. This choice can make a big difference in how comfortable you feel and how well you can walk. In this guide, we will explain the pros and cons of light and heavy hiking shoes, so you can decide which is better for your hikes. What is a Good Weight for Hiking Shoes? The weight of your hiking shoes can affect how tired you get while hiking. Lightweight hiking shoes, like the Salomon X Ultra 4 or Merrell Moab 3, usually weigh 1 to 1.5 pounds per pair. These shoes are good for short or easy hikes on smooth trails. Heavier hiking boots, like the Lowa Renegade GTX Mid or Vasque St. Elias GTX, can weigh 2.5 to 3.5 pounds per pair. These are better for long hikes or rough trails where you need extra support and protection. Light shoes: 1–2 pounds (Example: Salomon X Ultra 4) Medium weight shoes: 2–2.5 pounds (Example: Merrell Moab 3) Heavy shoes: 3+ pounds (Example: Lowa Renegade GTX Mid) Read more about hiking What is the Difference Between Lightweight and Heavyweight Hiking Boots? Light and heavy hiking boots are not just different in weight. Here are some other differences: Feature Lightweight Boots Heavyweight Boots Examples Altra Lone Peak 7, Salomon X Ultra 4 Scarpa Zodiac Plus GTX, Vasque St. Elias GTX Materials Light materials like mesh Thicker materials like leather Best for Short, easy hikes Long, tough hikes with rough terrain Pros Light, easy to move in Very strong, gives good protection Cons Less durable on rough trails Heavier, can make you tired faster Is it Better for Hiking Shoes to Be Tight or Loose? Hiking shoes shouldn’t be too tight or too loose. A good fit is important for comfort and to avoid blisters. Here’s what to check when trying on hiking shoes: Toe space: You should be able to move your toes comfortably. Shoes like the Altra Lone Peak 7 give more room for your toes. Heel fit: Your heel should not move up and down when you walk. If it does, the shoes are too loose. Midfoot fit: Shoes like the La Sportiva Nucleo High II GTX fit snugly around the middle of your foot, giving better support. Best Footwear to Use When Hiking The best shoes for hiking depend on where you plan to hike. Here are some simple tips: For short, easy hikes: Lightweight shoes like the Merrell Moab 3 are great. They are light and comfortable but still give good grip. For long hikes: If you’re hiking for several days, mid-weight boots like the Oboz Bridger Mid BDry or Lowa Renegade GTX Mid are better. They give more ankle support and keep your feet dry. For rocky or rough trails: Heavy boots like the Scarpa Zodiac Plus GTX are best. They protect your feet and help you keep your balance on uneven ground. Does Weight Matter in Shoes? Yes, the weight of your shoes matters a lot. Experts say that 1 pound on your feet feels like carrying 5 pounds on your back. This means that heavier shoes can make you tired faster, especially on long hikes. If you’re hiking on rough trails, however, heavy boots like the Vasque St. Elias GTX might be worth the extra weight. They give better protection and keep you safe from injury. Can I Wear Running Shoes on Hiking? Yes, you can wear running shoes for hiking if the trail is easy and flat. Trail running shoes, like the Hoka Speedgoat 5 or Salomon Sense Ride 5, work well on smooth trails and give good grip. But for harder trails with rocks or steep climbs, it’s better to wear proper hiking shoes or boots. Running shoes don’t give enough ankle support and can wear out quickly on rough ground. Conclusion: Should Hiking Shoes Be Light or Heavy? To sum up, the choice between light and heavy hiking shoes depends on the type of hiking you do. Lightweight shoes, like the Salomon X Ultra 4, are best for short or easy hikes where comfort and speed matter. Heavy boots, like the Scarpa Zodiac Plus GTX, are better for rough or rocky trails, giving more protection and support. Always consider the type of hike and the terrain before making your decision. ratndip Hello! I’m,Ratndip a dedicated trekking enthusiast with a deep love for exploring the world’s most captivating trails. With over 2 years of trekking experience, I’ve had the privilege of hiking through stunning landscapes, from the majestic Himalayas to the lush Amazon rainforest. My journey into trekking started as a personal quest for adventure and has evolved into a lifelong passion for discovering new terrains and connecting with nature. mountainhikingsite.com

6 Top Things to Do Near Dismals Canyon

Things to do near Dismals Canyon

Things to do near Dismals Canyon Want to escape the ordinary and find some hidden outdoor gems? This blog will take you on a journey to lesser-known parks and beautiful trails that promise fresh air and adventure. Whether you’re seeking a thrilling hike, a serene canoe ride, or a quiet spot to unwind, you’ll discover places that will inspire your next adventure. Dive in and let the great outdoors surprise you! Read more:-How to Visit Dismals Canyon in Alabama (2024) Rock Bridge Canyon Equestrian Park horse ride Have you heard of Rock Bridge Canyon Equestrian Park? If not, you’re in for a nice surprise! This park is like a hidden gem in Columbia, Missouri. If you love outdoor activities, especially riding horses, this is the perfect place for you. It’s right next to Rock Bridge Memorial State Park, and whether you’re a good rider or just want a quiet escape into nature, this park has something for everyone. When you arrive, there are over 30 miles of trails waiting for you. That means lots of space to ride, walk, or even bike if you prefer. The trails are easy to follow, and the views are amazing—rolling hills, open fields, and calm streams. It’s the kind of place where time seems to slow down. Don’t worry about how to get around—there are parking spots for horse trailers, steps to help you get on your horse, and even places for your horse to drink water. And if you don’t ride horses, you can still enjoy walking or biking on the trails. There’s something here for everyone! Sometimes, the park has special events or classes for riding, and if you’re lucky, you might catch one during your visit. There are also programs where you can learn about the local plants and animals, perfect for anyone who loves nature. And if you want more adventure, Rock Bridge Memorial State Park is right next door, where you can see the famous “Rock Bridge” formation. Columbia has many parks and outdoor places to explore, so you’ll never run out of things to do. A tip: if you plan to visit on a weekend, try to get there early for a good parking spot. Don’t forget to bring water, snacks, and good walking shoes. If you’re riding a horse, remember to wear a helmet. Checking the weather before you go can also help you avoid muddy trails! Next time you want to have some fun outdoors, keep Rock Bridge Canyon Equestrian Park in mind. It’s a great place to enjoy nature and have a memorable experience. Bear Creek Canoe Run If you like water activities, you have to check out Bear Creek Canoe Run. It’s hidden in northwest Alabama, near a small town called Phil Campbell in Franklin County, and it’s perfect for a peaceful day of canoeing or kayaking. Imagine floating down a calm river, surrounded by quiet nature. Doesn’t that sound relaxing? The river is about 26 miles long, but most people like to paddle the easy 9-mile section, which takes about 3 to 5 hours. The water is gentle and safe, making it great for beginners or anyone who just wants to relax. There’s one part called the “Rock Garden,” where the water splashes a bit, but don’t worry, it’s still safe and fun. What’s really nice is that Bear Creek has a shuttle service, so when you’re done paddling, they can drive you back to your car. It costs about $15 to $20. On the way, you might see animals like river otters, blue herons, and maybe even a deer or two. The best time to visit is in spring or early summer when the flowers are blooming. paddling There aren’t any places to buy food along the river, so be sure to bring your own snacks and water. And if you have extra time, you can visit Dismals Canyon nearby, where you can see tiny glowing creatures called Dismalites. It feels like a fairy tale! Bear Creek Canoe Run is the perfect place if you want a peaceful and fun day in nature. Sipsey Wilderness Sipsey Wilderness If you’re in the mood for something a little more wild, you should check out Sipsey Wilderness. This place is truly amazing. It’s in the Bankhead National Forest in Alabama, and Sipsey is like a paradise for anyone who loves hiking, camping, or just being out in nature. The wilderness area is about 25,000 acres big, with deep valleys, steep hills, and the beautiful Sipsey River. There are also waterfalls you won’t want to miss, like Fall Creek Falls and Shiprock Falls. These spots are great for resting during your hike and enjoying the scenery. There are many trails to pick from, but my favorites are the Sipsey River Trail and Bald Rock Trail. Whether you want a challenge or just an easy walk, there’s something for everyone. If you like camping in the wild, Sipsey is a great place for it! Just be ready for a more rugged experience—there are no set campsites, but that’s part of the fun, right? Fishing is also popular here. The river has lots of bass and catfish, so if you like to fish, bring your fishing gear. It’s easy to get there—just go to the Sipsey River Trailhead off Highway 33. The best times to visit are spring and fall when the weather is nice, and the colors are beautiful. You don’t need a permit for day hikes, but if you camp overnight, you’ll need one. One more thing—there’s little to no cell phone service, so take a map or GPS and tell someone where you’re going before you head out. Sipsey Wilderness is a dream for anyone who wants to escape and enjoy nature. You won’t regret visiting! Key Cave National Wildlife Refuge If you’re looking for a peaceful day outside, visit Key Cave National Wildlife Refuge in northwest Alabama. It’s a quiet, hidden spot that protects rare animals like the Alabama cavefish, which only lives … Read more

How to Visit Dismals Canyon in Alabama (2024)

Visit Dismals Canyon in Alabama

How to Visit Dismals Canyon Looking for a peaceful escape in nature? Visit Dismals Canyon in Alabama! This hidden spot offers beautiful trails, waterfalls, and the chance to see glowing Dismalites at night. Whether you’re hiking or just relaxing in the quiet beauty of the canyon, it’s a perfect getaway for nature lovers. Ready for a fun adventure? Dismals Canyon is waiting! Where is Dismals Canyon and How to Get There Dismals Canyon fall Dismals Canyon is located in Northwest Alabama, near the small town of Phil Campbell. It’s about a 2-hour drive from Birmingham and a little over an hour from Huntsville, making it a simple road trip from either city. The canyon is part of the Appalachian Mountains, offering a peaceful and quiet place to enjoy nature. If you’re coming from Birmingham, take I-65 N, then go towards Moulton via AL-157. After that, turn onto AL-33 N, and then take US-43 N to Phil Campbell. You’ll see signs for Dismals Canyon. From Huntsville, take US-72 W to Moulton, then follow AL-24 W and US-43 S, which will take you to the same area. There’s parking right by the entrance and visitor center, but it can get busy during peak times. Since there is no public transportation to the canyon, driving is the best way to get there. Also, be aware that GPS may not work well as you get closer, so follow the road signs. read more Dismals Canyon Hours: When Can You Visit? Dismals Canyon is open all year, but the hours change with the seasons: From March through September (spring and summer), the canyon is open from 10:00 AM to 6:00 PM Monday to Saturday, and from 12:00 PM to 5:00 PM on Sundays. From October to February (fall and winter), the hours are 10:00 AM to 4:00 PM on weekdays, and 12:00 PM to 4:00 PM on Sundays. If you want to see the famous glowworms (called Dismalites), night tours are available by reservation only, starting after sunset. Dismals Canyon Fees: What to Expect at the Entrance Before you go, here are the entrance fees: Adults (13 and older) pay $12.00. Children aged 5 to 12 pay $7.00. Children under 5 enter for free. Night tours for the Dismalites cost the same as general admission: $12.00 for adults and $7.00 for kids. Private night tours are available, ranging from $100 to $150 depending on group size. Seniors (65+) and military personnel with a valid ID can enter for $10.00. If you’re coming with a group of 10 or more, call ahead for group discounts. The Main Trail (Canyon Floor Trail) For an adventure, the Canyon Floor Trail is a must-see. It’s about 1.5 miles long and is a moderate hike, which means it’s manageable for most people. This trail takes you through the heart of the canyon, where you’ll see amazing sights like Rainbow Falls, a beautiful waterfall perfect for photos. Deeper in, you’ll find Secret Falls, a quieter and more secluded spot. secret fall Other cool spots include Temple Cave, where you can explore under large rocks, and Weeping Bluff, a tall cliff where water drips down like a natural waterfall. There’s also Witches Cavern, a unique rock formation that’s a bit spooky but great for taking pictures. temple cave The Rim Trail For an easier hike, try the Rim Trail, which is a 2-mile loop that follows the top edge of the canyon. This trail gives you great views from above and is less difficult than the Canyon Floor Trail. You’ll pass several overlooks where you can take panoramic photos of the canyon below.   Along this trail, you’ll also see ancient hemlock trees, which are huge and have been standing for hundreds of years. This is a great spot for sunrise or sunset, as the light over the canyon is breathtaking. Night Tours (Dismalites Viewing) If you want a magical experience, don’t miss the night tours. These guided walks, which cover 1 to 1.5 miles, take you through parts of the Canyon Floor Trail after dark. Why go at night? Because that’s when the canyon’s Dismalites come alive! These tiny glowing creatures light up the walls and caves, making it look like a sky full of stars. It’s a truly special and unforgettable experience. With a guide leading the way and only a little light, the tour feels like stepping into another world. This is one of the highlights of visiting Dismals Canyon!   FAQ of Dismals Canyon Is Dismals Canyon worth visiting? Yes, Dismals Canyon is a beautiful and unique natural landmark known for its lush greenery, waterfalls, and the rare bioluminescent creatures called “Dismalites.” It’s especially popular with nature lovers, hikers, and photographers. When to see Dismalites in Alabama? The best time to see Dismalites, the glow-in-the-dark larvae, is typically during the warmer months, from late spring through early fall. They are most visible during the evening and night hours. How long is the Dismals Canyon Trail? The main hiking trail through Dismals Canyon is about 1.5 miles long. It takes you through stunning rock formations, past waterfalls, and offers the opportunity to see the Dismalites at dusk. Where can I see Dismalites? Dismalites can be seen in Dismals Canyon, Alabama. They thrive in moist, dark environments, and the canyon provides the perfect habitat for them to glow at night. How to visit Dismals Canyon? To visit Dismals Canyon, you can plan a trip to Franklin County, Alabama, where it’s located. The canyon is privately owned, so visitors need to pay an entrance fee. It’s recommended to check their website or call ahead for specific visiting hours and availability of guided night tours. Can you swim at Dismal Canyons? Yes, swimming is allowed in designated areas at Dismals Canyon, particularly around the waterfalls and swimming holes. However, make sure to follow all posted signs and safety guidelines. ratndip Hello! I’m,Ratndip a dedicated trekking enthusiast with a deep love for exploring the world’s most captivating trails. With over 2 years … Read more

how to get to lower calf creek falls (2024)

How to Get to Lower Calf Creek Falls

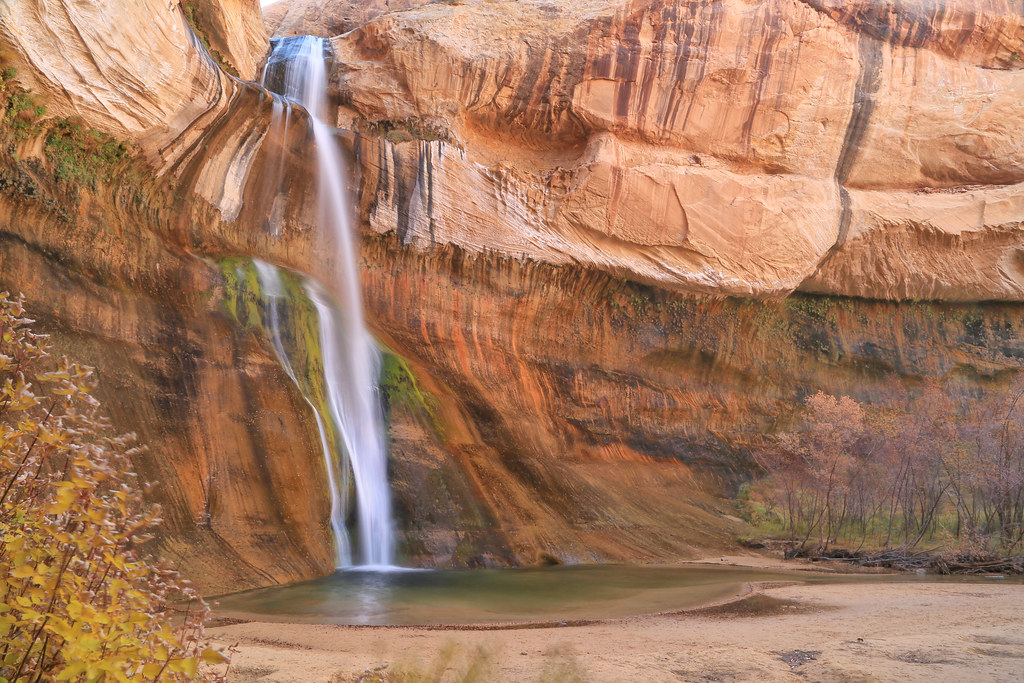
How to Get to Lower Calf Creek Falls Lower Calf Creek Falls Imagine finding a beautiful waterfall hidden in the Utah desert, where cool water falls down from a 126-foot cliff into a quiet pool below. This place is called Lower Calf Creek Falls, and it’s a spot you won’t want to miss. If you want to know how to get there and what to expect on the hike, this guide will show you step by step. Ready to explore one of Utah’s coolest spots? Let’s go! Lower calf creek falls trailhead parking To start, you’ll need to drive to the Calf Creek Recreation Area, which is located along Scenic Byway 12. If you’re coming from the town of Escalante, it’s about 5.5 miles east, while it’s around 11 miles west if you’re driving from Boulder, Utah. Using GPS coordinates 37.7969° N, 111.4132° W can help you find the exact location easily. Once you arrive, there’s a $5 parking fee, which you pay at a self-service kiosk. Facilities at the parking area include restrooms and picnic tables, but there’s no place to refill water, so make sure to bring plenty for your hike. The hike to Lower Calf Creek Falls is about 3 miles one way, meaning it’s a 6-mile round trip. The trail begins right at the parking lot, with a clearly marked trailhead. You can pick up a trail guide from the kiosk, which will give you information about various points of interest along the trail. The path is relatively flat but has a total elevation gain of about 500 feet, making it manageable for most hikers. However, the sandy and sometimes rocky trail surface can be challenging, so it’s best to wear sturdy hiking shoes for comfort and stability.   As you walk along the trail, you’ll pass through areas filled with juniper and sagebrush, giving you a true desert experience. About 1.5 miles in, keep an eye out for ancient Fremont pictographs on the cliff walls to your right. These rock art drawings are between 800 and 1,200 years old and are a fascinating glimpse into the history of the area. A bit further, you’ll come across granaries, small rock structures once used by Native Americans to store food. These are built into the cliffs and can be spotted on your left side as you approach the 2-mile mark. Just before you reach the waterfall, you’ll also pass some beaver ponds, which are often more visible in the morning or late afternoon when the light hits the water just right. ancient Fremont pictographs After about 3 miles, you’ll finally reach Lower Calf Creek Falls. The waterfall drops 126 feet into a beautiful pool surrounded by lush greenery, including ferns and moss. The sight of the waterfall is breathtaking, and the cold water is perfect for dipping your feet in after a long hike. The pool area provides a great spot for a picnic, with flat rocks to sit on while you enjoy the view. Just remember to take any trash back with you to help keep the area clean. Read more For a safe and enjoyable hike, make sure to bring at least 2 liters of water per person, as there’s nowhere to refill along the trail. Look out for trail markers, which are numbered signs that provide interesting facts about the surroundings and help you track your progress. Good hiking shoes are essential, as parts of the trail can be sandy and uneven. Lastly, don’t forget to protect yourself from the sun by wearing a hat, sunscreen, and sunglasses.   If you’re up for more adventure after your hike, there are other nearby attractions worth visiting. The Upper Calf Creek Falls Trailhead is located about 3 miles east of the Lower Falls parking area. This hike is shorter but much steeper, leading to another picturesque waterfall. Alternatively, you can visit Escalante Petrified Forest State Park, which is 15 miles west and offers trails that showcase petrified wood and views of Wide Hollow Reservoir. For some unique rock formations, head to Devil’s Garden, situated roughly 12 miles southeast, where you can enjoy exploring unusual sandstone structures.   Visiting Lower Calf Creek Falls is a fantastic way to experience the beauty of Utah’s landscapes. From the scenic drive to the waterfall’s refreshing spray, each step along the trail offers something unique. Enjoy the journey, take in the sights, and help preserve this natural wonder by leaving no trace behind. Happy hiking! ratndip Hello! I’m,Ratndip a dedicated trekking enthusiast with a deep love for exploring the world’s most captivating trails. With over 2 years of trekking experience, I’ve had the privilege of hiking through stunning landscapes, from the majestic Himalayas to the lush Amazon rainforest. My journey into trekking started as a personal quest for adventure and has evolved into a lifelong passion for discovering new terrains and connecting with nature. mountainhikingsite.com

Top Things to Do in Shangarh

Things to Do in Shangarh

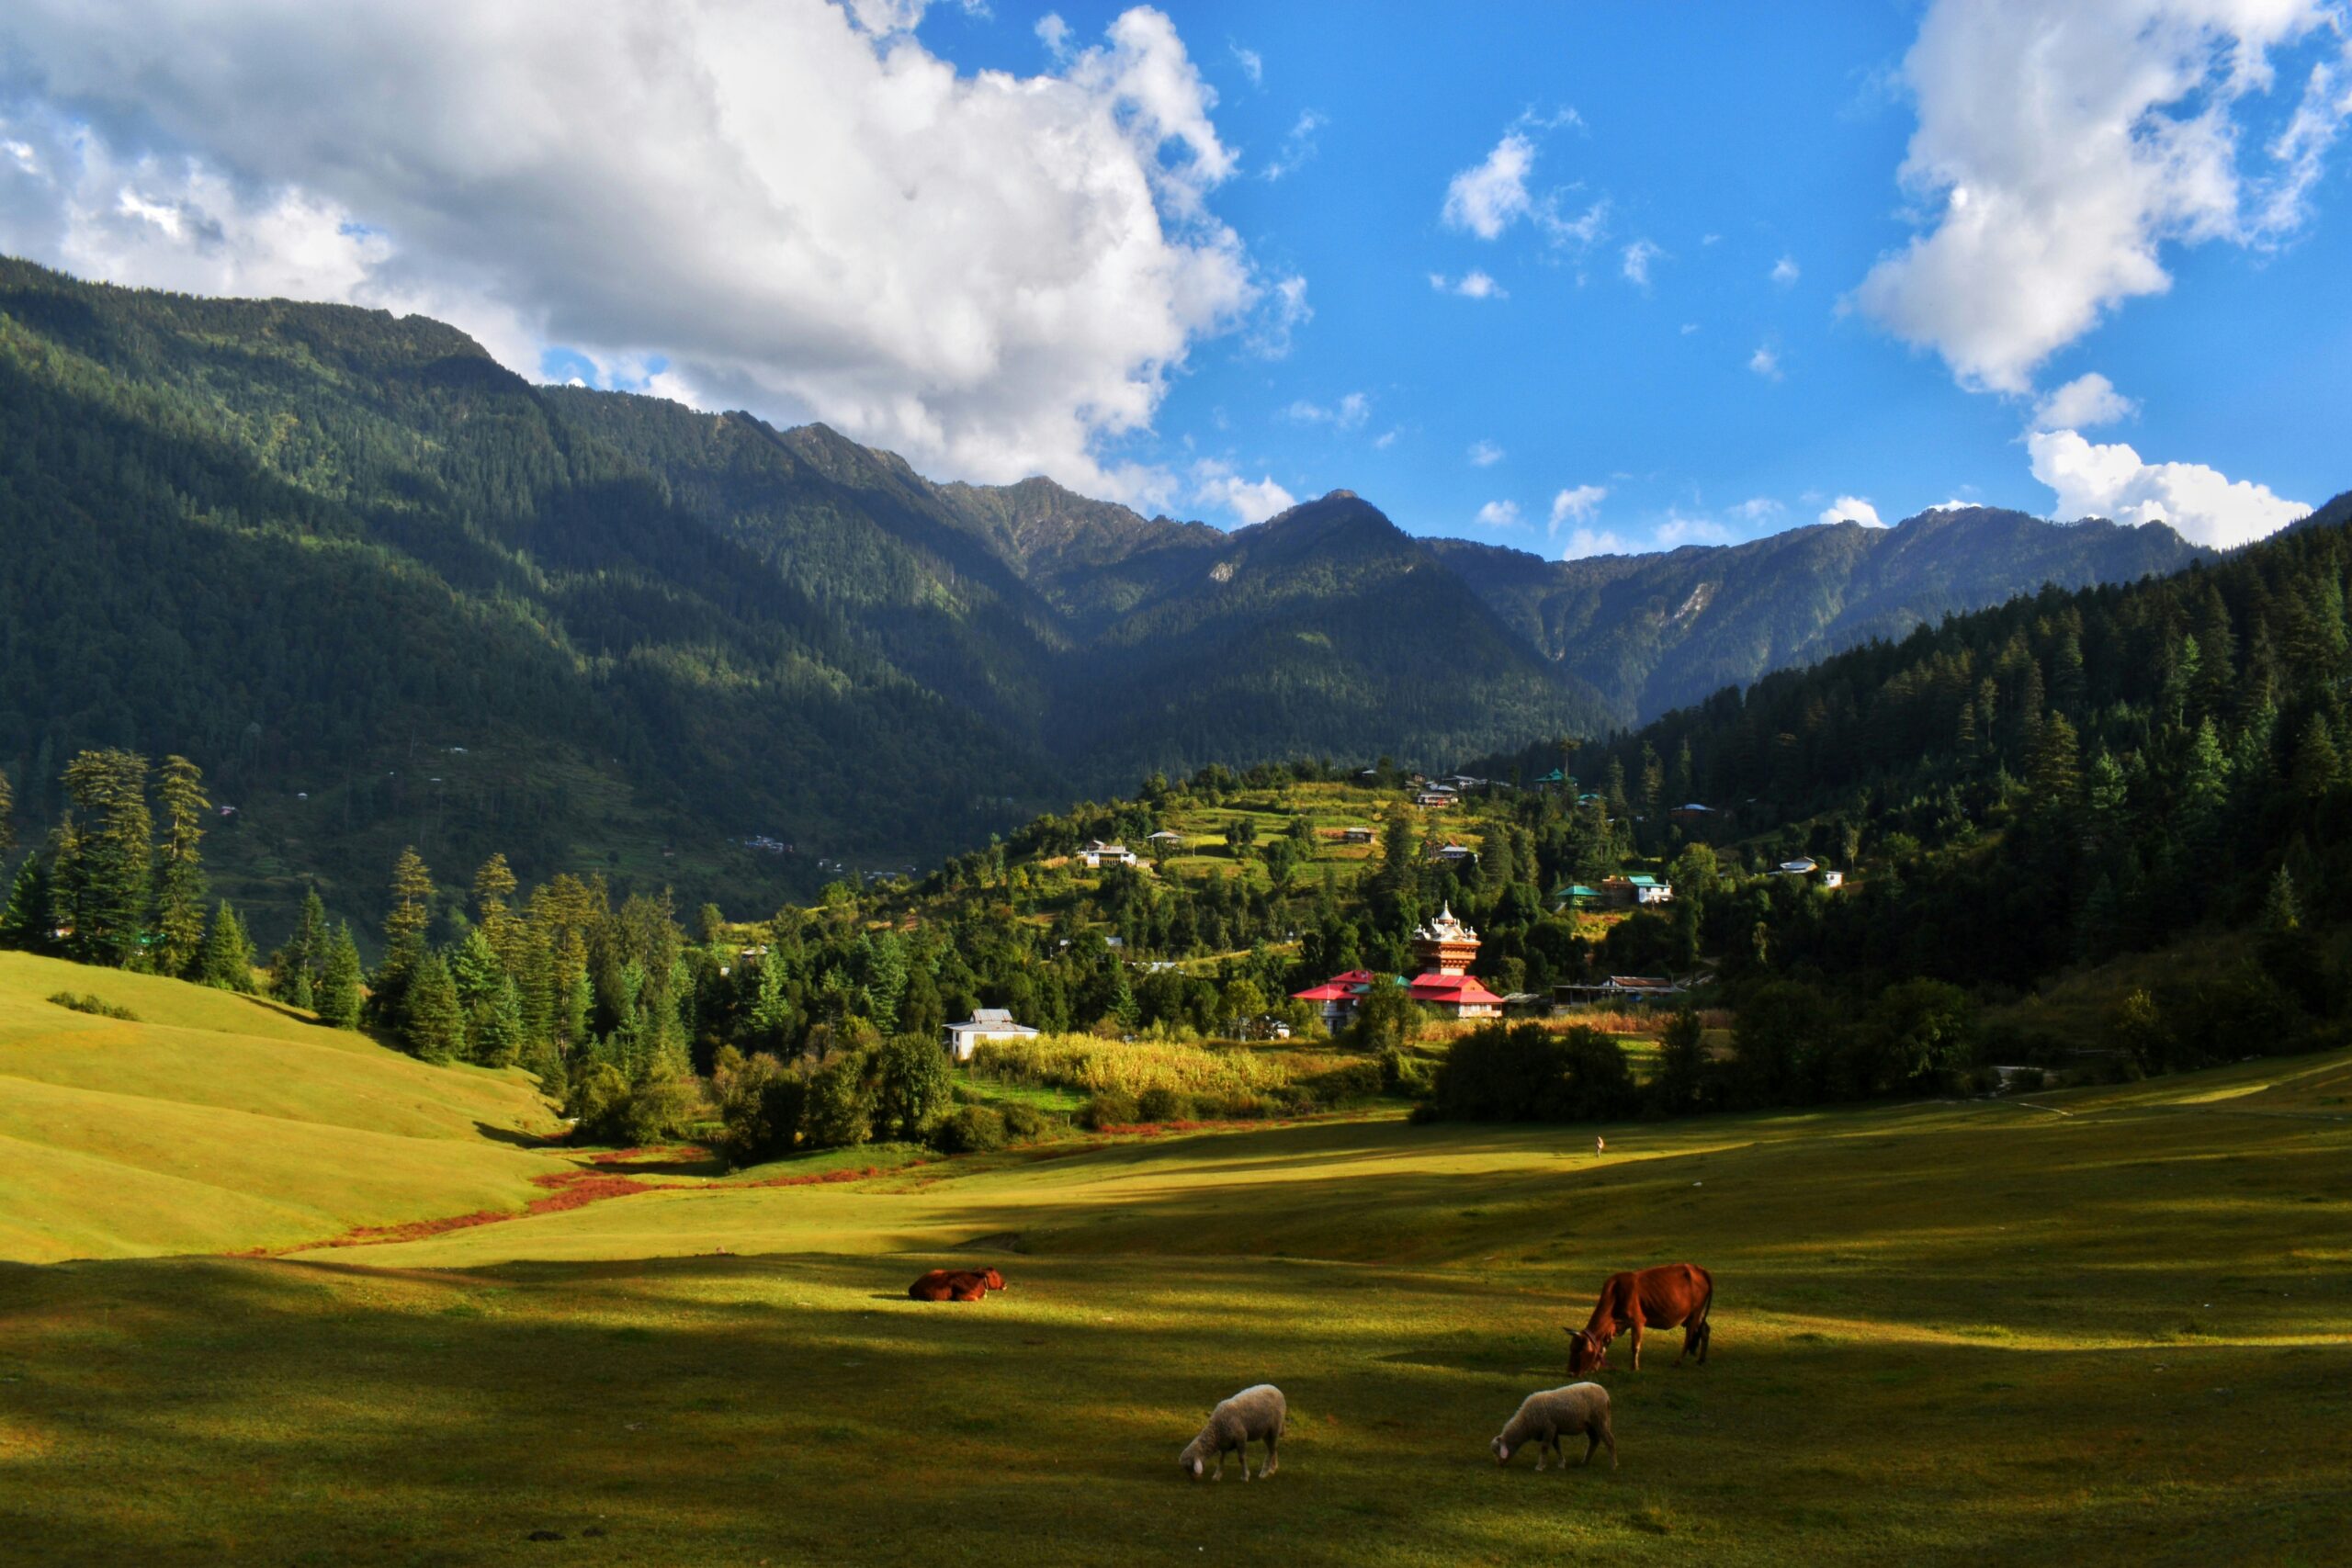
Things to Do in Shangarh: Your Simple Guide to Exploring This Beautiful Place Let me take you to a place where the mountains whisper ancient secrets, and every trail feels like it’s leading you somewhere extraordinary. Shangarh isn’t just a dot on the map—it’s an invitation to escape the ordinary and step into a world where meadows glow in golden sunlight, rivers flow with the purest clarity, and life slows to a peaceful rhythm. Trust me, there’s no other place quite like it. If you’ve ever craved a destination that feels untouched, unhurried, and unbelievably beautiful, then Shangarh is waiting to show you a side of Himachal you never knew existed. Ready to explore? Let’s dive into the most unforgettable things to do in Shangarh. 1. Walk Through the Shangarh Meadows Shangarh Meadows is a beautiful place in the Great Himalayan National Park that feels like a secret spot. It has wide, green fields surrounded by tall trees, and you can see snowy mountains in the distance. It’s the kind of place that feels peaceful and special, without a lot of crowds like other popular places. The meadow is a great spot for a picnic, or you can just lie on the grass and look up at the sky. It feels calm and free, like time slows down, which is really nice if you just want to relax. read more There’s also a small village nearby, which adds to the charm. The village has an old temple called Shangchul Mahadev. It’s made of wood and has been there for a very long time. People from the village often come here, and sometimes, during festivals, you can see them dancing and playing traditional music. If you like hiking, there are trails starting from the meadows that you can explore. Some paths are more challenging and go deep into the park, while others are easier and let you enjoy the scenery without too much effort. 2. Visit the Beautiful Barshangarh Falls Barshangarh Falls is a lovely waterfall near Shangarh. The water falls down a rock cliff, surrounded by trees, making it a perfect spot to enjoy nature. It takes a short walk from the village to reach the falls, and many people love to take pictures here. Take a dip in the cool water. Click some beautiful photos of the waterfall and its surroundings. 3. Watch Birds Shangarh is a great place for bird lovers. There are many different kinds of birds here, which makes it perfect for bird watching. The best time to watch birds is in the early morning when they are most active. Look for local birds like the Himalayan Monal and pheasants. Bring a pair of binoculars to see the birds clearly. 4. See the Twin Towers of Raila The twin towers of Raila are two old wooden structures near Shangarh. They are built in the traditional style of Himachal Pradesh and are believed to be very old. People think they were built to protect the village long ago. Look at the detailed wooden carvings and old design. Walk around the nearby village to see how the locals live. 5. Visit the Old Temples Shangarh has several old temples that show the village’s long history and traditions. One of the most important temples is the Shangchul Mahadev Temple, which is dedicated to Lord Shiva. It is close to the Shangarh Meadows and is special to the people here. Join in the local festivals that happen at the temple. Check out the interesting design and carvings on the temple. 6. Explore the Small Himachali Villages A visit to the nearby Himachali villages is a great way to learn about the local way of life. The small villages near Shangarh have friendly people who live in traditional ways. You can enjoy real Himachali food, customs, and culture here. Try local dishes like “Siddu” and “Dham.” Talk to the villagers to learn about their daily lives and customs. 7. Go Trekking in the Ecozone Shangarh is a starting point for many beautiful trekking paths, which are great for beginners and experienced hikers. The ecozone near the Great Himalayan National Park has many plants and animals and offers trails that take you through forests and beautiful landscapes. Go on a trek to Raktisar for amazing views. Discover hidden paths that lead to quiet places. 8. Drive to the Tirthan Valley Tirthan Valley is close to Shangarh and is worth a visit. It has clear rivers, green valleys, and is a great place for adventure activities. It’s perfect for a day trip if you are staying in Shangarh. Try trout fishing or relax by the Tirthan River. Enjoy adventure sports like rock climbing or river crossing. 9. Discover the Myths of Shangarh Shangarh is not only beautiful but also full of stories and myths. People believe that the Pandavas from the Mahabharata helped create the meadows here. Learning about these old stories makes visiting Shangarh even more interesting. Listen to local storytellers share the old tales about Shangarh. Take part in traditional events at the temples that show these old beliefs. Conclusion Shangarh has many wonderful things to do, from walking through peaceful meadows to visiting old temples and watching birds. This quiet village gives visitors a chance to enjoy nature, learn about history, and experience local culture. Don’t miss exploring nearby places like Tirthan Valley or trekking in the ecozone to make the most of your visit to this hidden gem in Himachal Pradesh. Take your time to enjoy the quiet surroundings, explore the natural beauty, and learn about the stories and traditions of this magical place. Shangarh is more than just a destination; it’s an experience you will remember. ratndip Hello! I’m,Ratndip a dedicated trekking enthusiast with a deep love for exploring the world’s most captivating trails. With over 2 years of trekking experience, I’ve had the privilege of hiking through stunning landscapes, from the majestic Himalayas to the lush Amazon rainforest. My journey into trekking started as a personal … Read more