Netravathi Peak Trek Guide: Everything You Need for an Amazing Adventure

Netravathi Peak Trek Guide

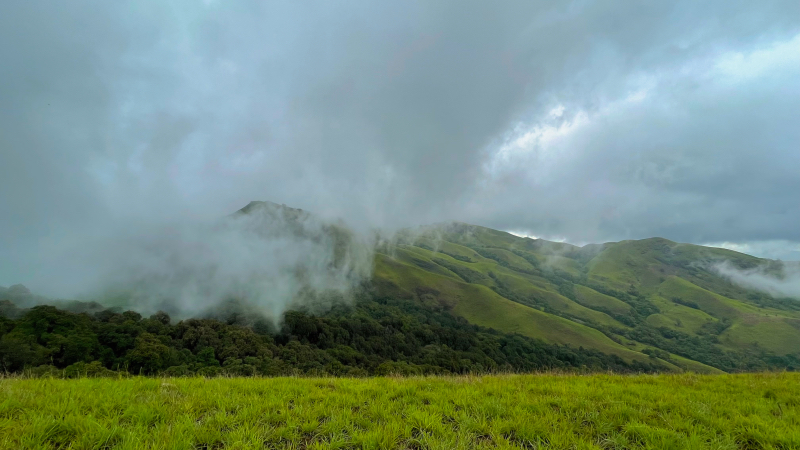
Netravathi Peak Trek Guide If you’re looking for Netravathi Peak Trek Guide, Netravati Peak is a great place to start. It’s not just about getting to the top; it’s about enjoying the whole experience. Imagine walking through thick green forests, climbing steep paths, and finally reaching the top where you can see hills and valleys all around. It feels like you’re far away from the everyday hustle, surrounded by nature’s calm. When I went, I was amazed at how peaceful it felt, like I had stepped into another world. The trek isn’t just for experts; it’s for anyone who loves being outside and exploring. This guide will help you plan your trip, giving you all the details you need to enjoy every moment of this exciting trek. Local Myths and History of Netravathi Peak Locals believe the Netravathi River, flowing down from the peak, was born from the tears of a celestial maiden named Netravathi. The story goes that she fell in love with a mortal man but had to leave him behind when she returned to the heavens. Her tears flowed down the mountain, forming the river that still nourishes the forests today. When the river is full during the monsoon, some say it’s her weeping for her lost love. The peak is also thought to be watched over by Betta Rani, a guardian spirit who ensures the safety of respectful trekkers. Villagers often perform small rituals before heading up, seeking her blessings for a safe journey. And there’s this old tale about a lost gold mine hidden somewhere in the mountain, supposedly guarded by forest spirits to keep it from being found by greedy treasure hunters. All these stories add a mystical charm to the trek, making you feel like you’re not just walking up a mountain but stepping into a place where legends come alive. It’s a place with history, heart, and a touch of magic that makes the adventure unforgettable. What to watch out for 1. Waterfalls Along the Path As you begin your trek, the trail quickly dives into a forested area. After hiking about 1.5 kilometers, you’ll come across a beautiful two-tiered waterfall. This spot is ideal for taking a short break and enjoying the refreshing atmosphere. The waterfall is especially lively during the monsoon season (June to September), when the rains make the water flow stronger and more impressive. The cool mist from the waterfall is a pleasant relief from the hike’s initial steep sections. 2. Changing Landscapes The trek offers a variety of landscapes, making it an ever-changing experience. It begins with a dense forest filled with tall trees and narrow paths, where the trail can be slippery due to wet leaves or mud. After navigating this forested area, the surroundings gradually open up, leading to rolling grasslands. Here, you can see the open sky, which makes it feel like you’re entering a completely different world. As you walk through the grasslands, keep an eye out for wildlife, such as small birds and butterflies. 3. Views of Kudremukh Peak When you reach the higher sections of the trail, you’ll be rewarded with sweeping views of the Western Ghats. If the weather is clear, you can spot Kudremukh Peak in the distance, about 15 kilometers away. The grassy hills and rugged mountains create a stunning panorama that is characteristic of the region. The air is usually cooler here, and you might even find yourself walking through clouds, depending on the season. 4. Rani Jhari Cliff and Ballalarayana Durga Fort On your way up, you’ll pass by the impressive Rani Jhari Cliff, known for its steep drop and dramatic views. The cliff provides a breathtaking vantage point over the valleys below, where you can see the lush forests and winding trails from above. If you’re up for an additional exploration, the nearby Ballalarayana Durga Fort is an ancient hilltop fort with ruins that date back several centuries. It offers a glimpse into the region’s history and provides another scenic viewpoint. The fort itself is about a 30-45 minute diversion from the main Netravati Peak trail and adds a historical element to the trekking experience. 5. Kalasa Hanging Bridge If you have extra time, you might want to visit the Kalasa Hanging Bridge after your trek. Located near the small town of Kalasa, this simple yet charming bridge crosses a local river. It’s not directly on the trekking route but can be a pleasant detour on your way back. The bridge gives you a different perspective of the area’s natural beauty, with the river flowing below and the surrounding hills in the background. Homestay Silent Valley Resort Located in Kalasa, about 18 kilometers from the base of Netravati Peak, Silent Valley Resort offers cozy cottages surrounded by greenery. The resort has a natural vibe with plenty of open spaces, and it’s a good place to relax after a day of trekking. The resort also offers activities like nature walks and bird watching. Upasana Retreat Located in Samse, about 20 kilometers from the trailhead, Upasana Retreat provides a quiet stay surrounded by coffee plantations. It offers basic facilities and a calm environment, perfect for a simple and comfortable experience. The hosts can also guide you to nearby attractions, making it easier to explore other places in the region. Girikandara Homestay Situated in Kalasa, this homestay is approximately 15 kilometers from the Netravati Peak trek’s starting point. It is a family-run place that offers a warm, welcoming atmosphere. The rooms are simple, but clean, and the food is homemade. It’s a good choice for travelers looking for a budget-friendly stay. Green Valley Homestay Located around 10 kilometers away in Kalasa, this homestay provides a good base for those trekking in the Western Ghats. The homestay has spacious rooms and offers views of the surrounding hills. It’s an affordable and comfortable option for those looking to stay near the trek route. Itinerary for a Netravati Peak Day 1: Arrival and Preparation Morning: Arrive at Kalasa, a small … Read more
Bright Angel Trail: A Hiker’s Journey

Bright Angel Trail: A Hiker's Journey

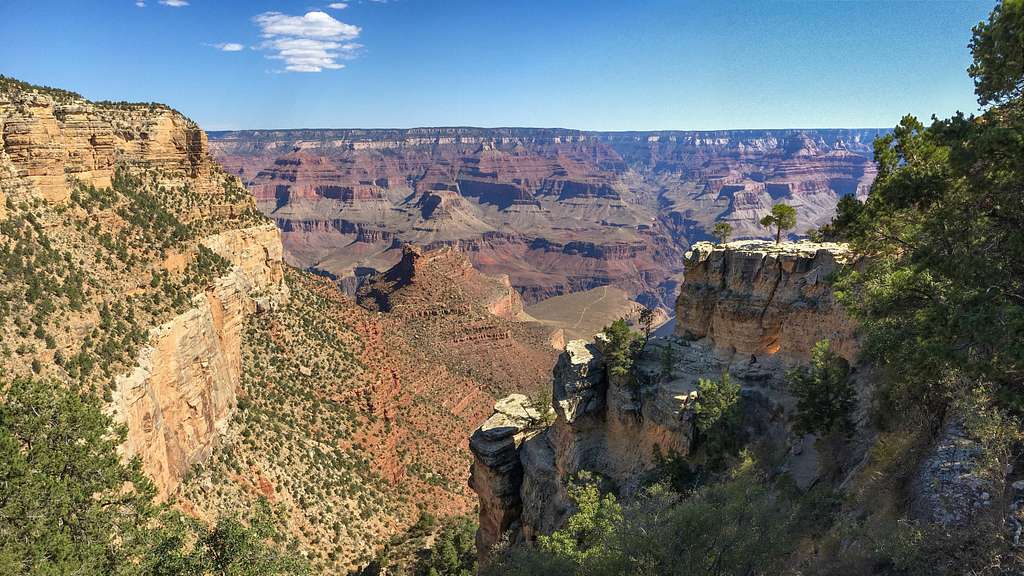
Bright Angel Trail: A Hiker’s Journey Imagine standing on the edge of one of the most iconic landscapes on Earth, the Grand Canyon’s South Rim. The wind carries a sense of adventure, the vastness of the canyon stretches out before you like a masterpiece painted over millions of years. Below, a serpentine path carves its way into the heart of the canyon, inviting you to step into this ancient wonder. This isn’t just any trail – this is the Bright Angel Trail, where every step leads you deeper into breathtaking beauty and a true test of your hiking spirit. The Bright Angel Trail is legendary, and for good reason. It’s not only the most popular trail in the Grand Canyon, but it also offers the perfect balance of accessibility and challenge. Whether you’re looking for a leisurely half-day trek to experience a taste of the canyon or planning a full descent all the way to the Colorado River, this trail has something for everyone. Towering rock formations, rich layers of geological history, and the promise of reaching the heart of the Grand Canyon make this hike a bucket-list experience. But here’s the deal – while the Bright Angel Trail is iconic, it’s also a hike that demands respect. Too many hikers make the mistake of underestimating it. Sure, the trail down feels easy, but the real challenge lies in the return, as every step back is an uphill battle. But don’t worry – this guide has got you covered. I’m not just going to tell you about the obvious stuff like distance and scenery. I’m going to arm you with everything you need to know so you can focus on enjoying the journey. From the best times to hike, the hidden gems along the trail, how to stay safe in the heat, where to refill water, and even how to get that coveted permit for an overnight stay it’s all right here. By the end of this guide, you’ll have the confidence to tackle Bright Angel Trail like a pro.   Trail Overview: What to Expect on the Bright Angel Trail Bright Angel Trail The Complete Phantom Ranch Visit: Lodging, Meals, and Adventure How to Get a Reservation at Phantom Ranch in 2024 If you’re planning to hike the Bright Angel Trail, buckle up for an experience that’s nothing short of epic. This trail is the most famous route in the Grand Canyon for a reason, offering a real adventure with every step you take down into the heart of the canyon. Length and Difficulty The trail stretches for 9.5 miles one-way from the South Rim all the way to the Colorado River. But don’t let that number fool you—it’s not just the distance that makes this hike a challenge. The elevation change is a jaw-dropping 4,380 feet, meaning your legs are going to get a serious workout. Hiking down might feel easy at first because gravity is doing some of the work, but trust me, the real challenge comes on the way back up. Bright Angel Trail This trail is notorious for being underestimated by many hikers. The descent lures you into a sense of comfort—steep switchbacks wind down through the canyon layers, and the views keep you mesmerized. But here’s the deal: what goes down must come back up, and that’s where the difficulty sets in. The climb back up is a relentless battle with the sun and gravity, and it can take twice as long as your descent. The effort is worth it, though—you’re experiencing the canyon like few others get to. Trailhead Location Finding the trailhead couldn’t be easier. The Bright Angel Trail starts right at the Grand Canyon Village, just west of the Bright Angel Lodge. It’s incredibly accessible, which is why it’s one of the busiest trails on the South Rim. There’s parking nearby (though it can fill up early), and if you’re staying at the village, it’s a short walk from most accommodations. The trailhead itself is well-marked, and you’ll often see a mix of day hikers, seasoned backpackers, and even mule riders heading down the same path. You’ll notice as soon as you start that the trail is well-maintained, with obvious markers and rest stops. The switchbacks begin almost immediately, giving you a bird’s-eye view of the canyon as you descend. Don’t worry if the first section feels crowded; it thins out the farther you go. Destination Options One of the best things about the Bright Angel Trail is that it gives you multiple destination options depending on your stamina, schedule, and how deep you want to venture into the canyon. Whether you’re a casual day hiker or an overnight backpacker, there’s a good stopping point for you. 1.5-Mile Resthouse This is a great turnaround point for beginners or those short on time. Located 1.5 miles from the trailhead, the resthouse offers shaded seating, bathrooms, and—depending on the season—water. The descent to this point is relatively moderate, and the ascent back up is manageable for most hikers. If you just want a taste of the trail without committing to the full hike, this is your spot. 3-Mile Resthouse Looking for something a bit more challenging? Head down to the 3-Mile Resthouse. This is where the trail starts to separate the casual hikers from the more determined ones. Like the 1.5-Mile Resthouse, there’s shade, restrooms, and seasonal water here. The views get even better as you descend, and by this point, you’re truly immersed in the canyon’s beauty. If you’re feeling strong, it’s worth pushing on to the next major point, but remember that climbing back out will be a serious workout. Indian Garden Now we’re talking about a deeper experience. Indian Garden is 4.5 miles from the trailhead, and it feels like an oasis tucked into the canyon. You’ll find a lush, shaded area with plenty of spots to rest, bathrooms, and—crucially—reliable water year-round. Indian Garden is also a popular overnight stop for backpackers who have secured a permit, and for … Read more

The Complete Phantom Ranch Visit: Lodging, Meals, and Adventure

Phantom Ranch Visit

How to Phantom Ranch visit: Your Complete Guide to Exploring the Grand Canyon’s Hidden Retreat silver bridge Phantom Ranch isn’t just any place – it’s the hidden gem nestled at the bottom of one of the world’s most iconic natural wonders: the Grand Canyon. Tucked away beside the Colorado River, Phantom Ranch is the only lodging within the depths of the canyon. It’s a place where time slows down, where the hustle of modern life is replaced by the echo of the wind, the sound of the river rushing past, and the crunch of your boots on dusty trails. What makes it truly extraordinary is not just its remote location, but the sense of accomplishment you feel when you arrive. You don’t just visit Phantom Ranch – you earn it. The journey to Phantom Ranch is as much a part of the experience as the destination itself. Whether you’re hiking down the steep trails or taking a mule ride along the canyon’s rocky ledges, the adventure begins long before you reach the cool shade of the ranch’s cottonwood trees. There’s no drive-up access, no casual strolling in. You’ve got to work for it, but the reward is worth every step.   How to Get to Phantom Ranch: Hiking Routes Bright Angel Trail: The Classic, Scenic Route Bright Angel Trail The Bright Angel Trail is the most popular route to Phantom Ranch, and for good reason—it offers a mix of challenging hiking, beautiful scenery, and relative accessibility for those prepared for the journey. Starting from the South Rim, you’ll be diving deep into one of the most iconic landscapes in the world. Distance and Elevation The full hike to Phantom Ranch via Bright Angel Trail is about 9.5 miles one way, with an elevation change of 4,380 feet. You’ll be descending the full depth of the Grand Canyon—trust me, that’s no joke, but every step rewards you with mind-blowing views. The descent feels pretty doable, but don’t be fooled. Going down is always the easy part—hikers often underestimate the energy they’ll need for the return climb. If you’re thinking of doing this hike as a day trip, be cautious. The average time to hike down is around 4 to 6 hours, but that entirely depends on your pace and how often you stop to take in the views (which will be hard to resist). Coming back up? That’s a different story. Allow 6 to 8 hours to climb back up to the South Rim. What to Expect on the Trail The trailhead starts at Bright Angel Lodge, and right from the get-go, you’ll be treated to sweeping views of the canyon. The first few miles are steep but well-maintained, with switchbacks to help manage the descent. Along the way, you’ll pass rest stops like 1.5 Mile Resthouse and 3 Mile Resthouse, which offer shaded areas, water (during the warmer months), and a place to take a breather. Make sure you’re hydrating constantly. About halfway down, you’ll hit Indian Garden, an oasis in the desert, complete with cottonwood trees, a bubbling creek, and—best of all—restrooms and water. This is the last reliable water source before you hit the bottom, so fill up. The scenery around Indian Garden is a stark contrast to the rocky, exposed terrain you’ve been hiking through. From here, you’ve still got about 4.5 miles to go. As you continue downward, you’ll start to hear the rushing of the Colorado River before you see it. By the time you cross the Silver Bridge, you’re just minutes away from Phantom Ranch. The river’s deep green water cutting through the red rock is pure magic. Difficulty Bright Angel is tough, but it’s well-trafficked and has more gradual elevation change than the South Kaibab Trail. With its resthouses and more frequent shade, this trail is a bit more forgiving. However, don’t let that lull you into thinking it’s easy. You’ll need to be in solid shape, carrying plenty of water and snacks, and prepared for extreme weather conditions, especially in summer. The return hike is notorious for being brutal, with the ascent feeling twice as hard as the descent. South Kaibab Trail: Shorter, Steeper, and Wild South Kaibab Trail For hikers looking for a quicker, steeper route, the South Kaibab Trail is a fantastic option—but be warned, it’s not for the faint of heart. Starting from Yaki Point, this trail is more direct, cutting straight down the canyon with little mercy on your knees or quads. Distance and Elevation The South Kaibab Trail is 7.1 miles to Phantom Ranch, with an elevation change of about 4,780 feet. It’s shorter than Bright Angel, but what you save in distance, you gain in intensity. This trail is steeper, with fewer switchbacks to help ease the descent, and it’s almost entirely exposed to the elements. Time to hike down is usually between 4 to 5 hours, but expect to spend 6 to 8 hours if you’re coming back up. Most people recommend using Bright Angel for the ascent due to its more gradual incline and the water stops along the way. What to Expect on the Trail The first thing to know about South Kaibab: it’s exposed—no water, no shade, just you and the canyon. That makes this trail a better choice in the cooler months or for those starting super early in the day. Despite the exposure, the views are nothing short of jaw-dropping. You’ll feel like you’re walking along the spine of the canyon, with expansive vistas opening up in front of you at every turn. The Ooh Aah Point (yes, that’s its actual name) hits early in the hike, about 1 mile down, and trust me, it’s named perfectly. The sheer beauty will stop you in your tracks. Further down, you’ll pass Cedar Ridge and Skeleton Point, both offering unbeatable viewpoints of the canyon and the river below. While these lookouts are stunning, the trail’s lack of water and shade means you have to keep moving steadily. Don’t plan on stopping … Read more

How to Get a Reservation at Phantom Ranch in 2024

Phantom Ranch Visit

  Reservation at Phantom Ranch Phantom Ranch Tucked away at the bottom of the Grand Canyon, Phantom Ranch offers a once-in-a-lifetime experience for adventurers craving both beauty and solitude. Its remote location, stunning vistas, and historic charm make it a coveted destination for hikers. However, with its limited accommodations and high demand, securing a reservation can feel like a challenge. Fear not! This comprehensive guide will walk you through every step of the process—from booking your stay to planning your hike—so you can focus on enjoying your Grand Canyon adventure. Let’s dive in and get you one step closer to the magic of Phantom Ranch! How to Get a Reservation at Phantom Ranch: Your Ultimate Guide Nestled deep within the Grand Canyon, Phantom Ranch is an iconic oasis that offers a unique and unforgettable experience for hikers. Whether you’re seeking a restful retreat after a long day on the trails or looking to explore the stunning beauty of the canyon, securing a reservation at Phantom Ranch is essential. Here’s a detailed guide to help you navigate the reservation process, ensuring you get the most out of your adventure. 1. Understand the Reservation Basics What is Phantom Ranch? Phantom Ranch is a historic lodge located at the bottom of the Grand Canyon, accessible primarily by hiking. It offers rustic accommodations, meals, and a breathtaking view of the Colorado River. The allure of Phantom Ranch lies in its remoteness and the serenity of its surroundings, making it a coveted destination for hikers. Reservation Availability: Reservations for Phantom Ranch can be made up to 15 months in advance, typically opening on the first of each month. For example, reservations for May open on April 1 of the previous year. The demand is high, especially during peak hiking seasons (spring and fall), so planning ahead is crucial. 2. Choosing Your Method of Reservation Online Reservations: The primary way to reserve a spot at Phantom Ranch is through the Grand Canyon National Park’s official website. Navigate to the Phantom Ranch page where you can access the online reservation system. Create an account ahead of time for a smoother booking experience. This way, you can log in quickly when reservations open. step-by-step guide Step 1: Log in or Create an Xanterra Account Once you click the Reservations button, you’ll be directed to the Xanterra booking system. If you already have an account, log in with your email and password. If you don’t have an account, you’ll need to create one by clicking on the “Sign Up” option and filling in your details (email, password, name). Step 2: Select Your Dates and Group Size Once logged in, you’ll be prompted to enter your desired check-in and check-out dates. Use the calendar to choose the dates, but keep in mind Phantom Ranch reservations are typically booked out months in advance. You’ll need to be flexible and try different date ranges if your first choice isn’t available. Enter the number of people in your party and choose whether you’re booking for a mule ride, hiking stay, or rafting trip. Step 3: Submit a Lottery Request (if Booking 13-15 Months in Advance) If you’re attempting to book more than 13-15 months in advance, Phantom Ranch uses a lottery system. On the lottery page: Enter your preferred dates, alternative dates, and the size of your group. Submit your entry for the lottery, and you will be notified if your request is accepted. Step 4: Choose Your Accommodation If availability shows up for your selected dates, you’ll be given a few accommodation options: Cabins: Private, with bunk beds, and can accommodate up to 10 people. Dormitories: Separate male and female dorms, offering a communal bunk-bed setup. Select the accommodation that fits your party’s needs. Step 5: Select Meals Once you’ve chosen your accommodation, you’ll need to select meal options: Breakfast (usually a hearty meal, perfect before the return hike). Sack Lunch (for hikers spending the day on the trail). Dinner: Choose between Steak Dinner or Vegetarian Chili. Meals must be booked in advance as Phantom Ranch does not offer à la carte meal services due to limited capacity. Step 6: Review Your Reservation Details Review all the details of your reservation, including: Dates Accommodation type Meals added Total price Double-check everything before proceeding to payment, especially since changes after this step can be difficult due to high demand. Step 7: Enter Payment Information You’ll now be directed to the Payment Page where you’ll enter your credit card details. Fill in your name, card number, expiration date, and billing address. Review the cancellation policy (Phantom Ranch has a strict cancellation policy, so ensure you’re aware of deadlines for refunds). Once you’ve entered your details, submit your payment. Step 8: Confirm Your Reservation After submitting payment, you will receive an email confirmation from Xanterra that includes: Reservation number Dates of stay Accommodation details Meal options Print out or save this email for future reference. Phone Reservations: If you prefer speaking with someone or have specific questions, you can call the Grand Canyon Lodge reservations office at (888) 297-2757. Be prepared to provide your desired dates, the number of people in your party, and your preferences for lodging (dormitory, cabin, or camping).   The cost of staying at Phantom 1. Cabins Standard Cabin (accommodates up to 4 people): $209–$314 per night (depending on the season). Cabins come with basic amenities like bedding, towels, soap, and electricity, but showers are shared. 2. Dormitory Male or Female Dormitory (bunk-style accommodations, up to 10 people per dorm): $79–$129 per person, per night. Dormitories include bunk beds, bedding, and towels. Showers are communal. 3. Meal Packages Steak Dinner: Around $55–$75 per person. Vegetarian Dinner: Around $40–$60 per person. Breakfast: Around $25–$30 per person. Sack Lunch: Around $20 per person. 3. Know the Types of Accommodations Understanding the various lodging options available at Phantom Ranch will help you make an informed decision: Dormitory Beds: Perfect for solo travelers or those on a budget. Dorms accommodate up to 10 people … Read more

How to Get a Permit for The Subway Zion in 2024

How to Get a Permit for The Subway Zion

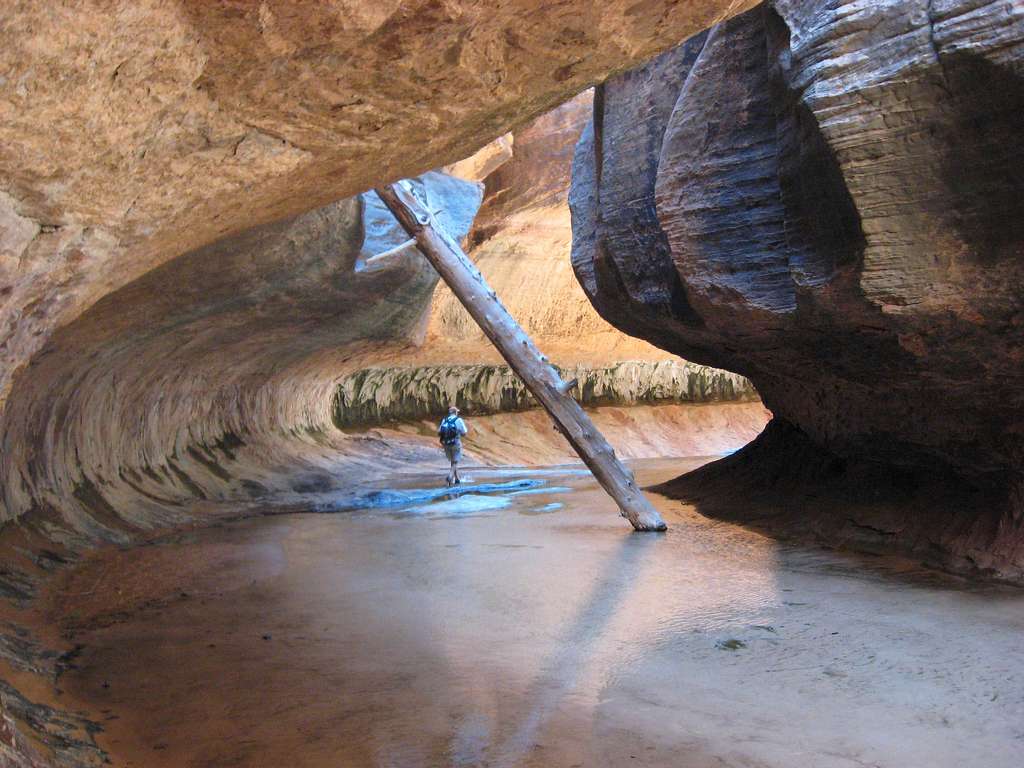
How to Get a Permit for The Subway Zion: A Complete Guide Subway Zion If you’re dreaming of hiking The Subway in Zion National Park, you’re about to embark on one of the most stunning, adventurous trails out there. But, before you lace up your boots, there’s one critical thing you need: a permit. This guide covers every detail you’ll need to secure that coveted permit, ensuring you won’t have to search anywhere else. Let’s dive in! Why Do You Need a Permit for The Subway Hike? The Subway, with its unique tunnel-like canyon, vibrant emerald pools, and waterfalls, is extremely popular. To protect this natural beauty, Zion National Park limits daily hikers, requiring permits for both the Bottom-Up (non-technical) and Top-Down (technical/canyoneering) routes. Only 80 permits are available per day, so it’s crucial to know how to get one. Three Ways to Get a Permit for The Subway Hike The Seasonal Lottery The Daily Lottery Walk-In Permits Each method has its own requirements, so I’ll break them down to make sure you’re fully prepared. 1. The Seasonal Lottery The Seasonal Lottery is your best bet for securing a permit well in advance of your trip. Here’s how it works: When to Apply: The lottery opens months before the actual hiking season. You need to apply for permits during specific windows depending on when you plan to hike. Hiking Season Apply During Spring (March-May) January 1st – January 31st Summer (June-August) April 1st – April 30th Fall (September-November) July 1st – July 31st Winter (December-February) October 1st – October 31st How to Apply: Head to recreation.gov and search for “Zion Left Fork North Creek (Subway) Seasonal Lottery.” You can select up to 4 possible dates for your hike. Specify the number of permits you need (each hiker must have one). Cost: It costs $6 to enter the lottery (non-refundable), and if you win, you’ll pay $10 per permit. Notification: You’ll receive an email notification 2 days after the lottery closes. If you win, you’ll have to confirm your reservation by the specified deadline. Miss this deadline, and you lose your permit! Pro Tip: The Subway permits are highly competitive, especially for weekends and holidays. If your dates are flexible, consider applying for weekdays to increase your chances. 2. The Daily Lottery: Last-Minute Permits permit Missed the Seasonal Lottery? Don’t worry! You still have a shot with the Daily Lottery, but it requires quick action. When to Apply: The daily lottery opens 2 days before your planned hike, between 12:00 AM and 3:00 PM Mountain Time. How to Apply: Go to recreation.gov and enter the “Zion Canyoneering Daily Lottery.” You can apply for a permit for up to 6 people. Cost: The entry fee is $6, and if you win, the permit fee is $10 per person. Notification: You’ll get an email or text notification by 4:00 PM Mountain Time the same day. If you’re successful, you’ll need to confirm your permit right away. Pro Tip: If you’re visiting Zion during a busy season, set a reminder on your phone to apply early in the morning. Permits go fast! 3. Walk-In Permits: The Last-Minute Gamble If both lotteries don’t work out, your final option is to try for a walk-in permit. How it Works: Any unclaimed or canceled permits from the lottery system are made available on a first-come, first-served basis at the Zion Canyon Visitor Center. Best Strategy: Arrive as early as possible, even the day before your hike, to inquire about any leftover permits. The Wilderness Desk typically opens at 7 AM, but it’s wise to get there earlier during peak season to improve your chances. Pro Tip: If you’re flexible with your dates and are visiting for a few days, keep checking the desk for any last-minute cancellations. Picking Up Your Permit: Important Details If you’ve successfully secured a permit through any of the methods above, the next step is picking it up in person. You cannot print or download the permit—here’s what you need to do: Where to Go: Head to the Wilderness Desk at the Zion Canyon Visitor Center (located near the park entrance). When to Pick It Up: Permits must be picked up the day before or the day of your hike. You’ll review trail conditions with a park ranger, who will provide important safety tips and any last-minute updates on the trail. What to Bring: A valid photo ID. Your vehicle information (make, model, and license plate) for the parking permit. Details of your hiking party. Pro Tip: Plan ahead and give yourself enough time to pick up the permit, as the Wilderness Desk is a 40-minute drive from the Left Fork Trailhead, where your hike begins. Tips for Getting a Permit and Planning Your Hike Getting a permit for The Subway hike can feel like a game of chance, but these tips will help increase your odds: Be Flexible with Your Dates: When applying, avoid peak times like weekends and holidays. Weekday permits are less competitive. Apply as Early as Possible: For both the Seasonal and Daily Lottery, get your application in as early as the system allows. Prepare for Any Conditions: Conditions at The Subway can vary dramatically based on the season. For example, spring might bring higher water levels, while fall offers cooler, more stable weather. Be prepared to adjust your gear accordingly. Why the Subway Hike Is Worth It Despite the effort it takes to get a permit, The Subway hike is absolutely worth every step. Picture yourself navigating between red canyon walls, with water shimmering in emerald pools beneath you. As you scramble over rocks and waterfalls, you’ll understand why this is Zion National Park’s most prized trail. And, thanks to the limited permits, you’ll get to enjoy the experience without the crowds. Final Thoughts Securing a permit for The Subway might take some planning, but once you’ve got that golden ticket, you’re in for an unforgettable adventure. With this guide, you now have everything you need to … Read more

How to Reach Shangarh: Your Peaceful Escape in Himachal’s Hidden Valley

How to Reach Shangarh: Your Peaceful Escape in Himachal's Hidden Valley

How to Reach Shangarh: Your Peaceful Escape in Himachal’s Hidden Valley Shangarh is a peaceful, hidden gem in the Sainj Valley of Himachal Pradesh, far less crowded than popular hill stations. It’s located in the Great Himalayan National Park, a UNESCO World Heritage Site known for its lush meadows, old temples, and rich cultural heritage. Surrounded by stunning mountains, it offers a quiet escape where you can enjoy nature, explore local traditions, and soak in the beauty of green fields and fresh mountain air. It’s like a secret, perfect for those who love adventure and peace away from the busy tourist spots.   To help you understand how to get to Shangarh from some big cities like Delhi, Chandigarh, and Manali, let’s break it down in a simple way that’s easy to follow! 1. Delhi to Shangarh (500 km, 12-13 hours by car) Getting from Delhi to Shangarh is a long but beautiful journey through the mountains. Here’s how it works: Start from Delhi: Imagine you’re leaving from Delhi, which is a huge city with lots of people and cars. You’ll begin your trip by taking NH44 (National Highway 44). It’s a big road that takes you out of the city. Go through Ambala and Chandigarh: After a few hours on NH44, you’ll pass through Ambala and Chandigarh, both important cities in northern India. These are good places to stop for a snack or to stretch your legs! Enter the Hills via NH205: Once you cross Chandigarh, the real adventure begins. You’ll switch to NH205, a highway that takes you towards the hills of Himachal Pradesh. The air gets cooler, and you’ll start to see mountains. Reach Mandi: About 7-8 hours into your journey, you’ll reach a town called Mandi, which is like the gateway to the mountains. From here, the roads get more twisty as you drive higher into the hills. Pass Aut and Larji: After Mandi, you’ll head toward Aut. Here, there’s a long tunnel called the Aut Tunnel—it’s really cool because it’s almost 3 km long! Once you exit the tunnel, you’ll continue toward Larji, a tiny place along the river. Final Stretch to Shangarh: From Larji, you’ll take smaller, narrower roads into the beautiful Sainj Valley, where Shangarh is located. The roads here can be a little bumpy, but they’re full of pretty views like forests, rivers, and snow-capped peaks. Finally, after about 12-13 hours, you’ll reach Shangarh, a peaceful, green village. 2. Chandigarh to Shangarh (250 km, 7-8 hours by car) If you’re starting from Chandigarh, the journey is shorter, and the mountains come up faster! Start from Chandigarh: Chandigarh is a nice, planned city, and you’ll start by taking NH205 straight out of the city. This highway takes you toward the hills pretty quickly. Pass through Bilaspur: About 3-4 hours in, you’ll pass a town called Bilaspur, which is right next to a large lake called Gobind Sagar Lake. It’s a great spot to stop and take a break or even enjoy some food. Drive to Mandi: After Bilaspur, the journey continues through scenic roads until you reach Mandi, where the roads start getting a bit curvier as you climb higher into the mountains. You’re almost halfway to Shangarh! Continue through Aut and Larji: Just like from Delhi, after Mandi, you’ll pass through Aut and then Larji, with the cool Aut Tunnel and the sparkling river on your side. Reach Shangarh: Finally, the last stretch of the journey will lead you into the quiet valley where Shangarh awaits. By now, you’ll be fully surrounded by mountains, trees, and fresh air. 3. Manali to Shangarh (90 km, 3 hours by car) The shortest and easiest route is from Manali, a famous hill station. If you’re already in Manali, getting to Shangarh takes just a few hours. Start from Manali: Manali is already high in the mountains, so your drive will be full of twists and turns as you follow the Beas River downhill. Reach Aut: In about 2 hours, you’ll arrive at Aut, where you’ll take a turn towards Larji. You’ll pass the Aut Tunnel again, and before you know it, you’ll be at Larji. Head to Shangarh: From Larji, it’s just a short drive into the Sainj Valley, and Shangarh is waiting there with its peaceful meadows and quiet charm. In just 3 hours, you’ll be in a place that feels far away from the hustle and bustle of Manali.   How to Reach Shangarh: Transportation Options Getting to Shangarh, a hidden gem in the Sainj Valley of Himachal Pradesh, is an exciting adventure! Let’s explore the different ways you can travel to this beautiful village, whether you prefer to drive, take a bus, train, or fly. 1. By Car/Self-Drive Imagine cruising through the stunning mountains with fresh air and breathtaking views! If you have a car, self-driving to Shangarh can be a fantastic option. Road Conditions: The roads leading to Shangarh are narrow and winding, so you’ll need to be careful while driving. Picture yourself driving along cliffs with green valleys below and majestic peaks above. It’s important to keep your speed slow and steady to enjoy the beautiful scenery safely. Renting a Car: If you don’t have a car, you can rent one. There are many rental services available in nearby cities. Just remember to check if the rental car is suitable for hilly roads! Hiring a Driver: If you’re not comfortable driving on tricky mountain roads, hiring a driver can be a smart choice. They know the roads well and can help you relax and enjoy the ride. Scenic Beauty: As you travel towards Shangarh, especially near the Sainj Valley, you’ll see lush green fields, colorful flowers, and maybe even some friendly animals along the way. Don’t forget to take pictures and enjoy the journey! 2. By Bus Taking a bus is a great option, especially if you want to sit back and relax while someone else does the driving. From Delhi or Chandigarh: If you start from Delhi or … Read more

8 Easy Trek in Himachal

8 Easy Trek in Himachal

Introduction If you’ve ever dreamt of stepping into a land of snow-capped mountains, sparkling lakes, and meadows that stretch as far as the eye can see, then Himachal Pradesh is the place for you! This beautiful state in northern India is home to some of the most incredible trekking destinations, like Kereri Lake, Beas Kund, Bhrigu Lake, Prashar Lake, Hampta Pass, Triund, and Chopta Chandrashila. Whether you’re an experienced hiker or someone looking for a peaceful escape into nature, these treks will fill your heart with adventure, wonder, and stunning views. Kereri Lake Kereri Lake: Kereri Lake is tucked away in the Kinnaur district of Himachal Pradesh, India. Imagine high mountains, green meadows, and a sparkling lake surrounded by nature. The lake sits at a lofty height of about 2,934 meters (10,500 feet), meaning it’s pretty high up in the Himalayas! The area around the lake is full of stunning views, tall pine trees, and, if you’re lucky, some friendly wildlife. It feels like stepping into a fairy tale!   How To Get There Getting to Kereri Lake is an exciting journey, and here’s how you can do it step by step: Start from Shimla: First, you’ll want to get to Shimla, the capital city of Himachal Pradesh. It’s a popular place to visit and is easy to reach by bus or train. If you’re traveling from Delhi, you can take an overnight train or a bus to Shimla. Travel to Sangla: Once you’re in Shimla, you need to head to Sangla, which is the starting point for the trek to Kereri Lake. You can take a bus or hire a taxi. The drive to Sangla takes about 7 to 8 hours, and you’ll see some breathtaking views along the way, with valleys and rivers dancing beside the road! Start the Trek: After reaching Sangla, you’re ready to start your trek to Kereri Lake! The trek usually takes around 4 to 5 days, depending on how fast you walk and how many breaks you take. You’ll pass through lovely villages, climb up hills, and enjoy the beauty of nature. It’s a journey filled with discovery!   Best Time To Go May to June: Spring is a fantastic time to visit! The weather is warm, and flowers bloom everywhere. You can see colorful wildflowers and hear the cheerful songs of birds. It’s perfect for taking pictures and exploring! September to October: If you miss spring, autumn is another wonderful time. The air is fresh and cool, and the leaves change colors, painting the hills in shades of red, orange, and gold. Just like in a painting!    Beas Kund Beas Kund The Beas Kund Trek is located in Himachal Pradesh, a state in northern India known for its beautiful mountains and lush valleys. The trek starts from Solang Valley, which is just about 14 kilometers (8.7 miles) from Manali, a popular hill station. The Beas Kund itself is a small, shimmering glacial lake situated at an altitude of around 3,700 meters (12,139 feet). It’s said to be the source of the Beas River, which flows through the valley below. Special places Solang Valley: This is where your adventure begins! Known for its adventure sports like paragliding and zorbing, you can soak in the beautiful views of the snow-capped mountains and lush greenery before you start your trek. Gulaba Village: On your way, you’ll pass through the charming Gulaba Village. It’s a great place to take a break, enjoy some local snacks, and watch the villagers go about their daily life. You might even meet some friendly mountain dogs! Beas Kund: Once you reach the lake, take a moment to enjoy its beauty. The water is crystal clear, surrounded by magnificent peaks like Hanuman Tibba and Indrasen Peak. It’s a perfect spot for a picnic and some fun photos! Mountain Views: Throughout the trek, keep an eye out for breathtaking views of the surrounding mountains. The sight of the snow-covered peaks is simply awe-inspiring! How to Reach Beas Kund Start from Manali: First, you’ll need to reach Manali. You can do this by taking a bus or car from nearby cities like Chandigarh or Shimla. The journey is beautiful, with scenic views along the way. Head to Solang Valley: From Manali, you can take a taxi or a local bus to Solang Valley. The ride takes about 30 minutes and is super fun as you wind through the mountains. Trek to Beas Kund: Once you reach Solang Valley, the trek to Beas Kund usually takes about 4-5 hours. The trail is well-marked and passes through lush meadows, rocky paths, and even some streams. Make sure to take your time and enjoy the journey! Best Time to Visit May to June: This is the start of summer, and the weather is pleasant and sunny. The snow is melting, and the landscapes are vibrant and green. Perfect for hiking and exploring! July to August: This is the monsoon season, and it can rain a lot. While the mountains look lush and green, trekking can be tricky because of slippery trails. It’s better to avoid this time unless you’re really adventurous! September to October: As summer fades, the weather becomes cooler and more stable. The views are clear, and you might even see some autumn colors in the leaves. This is a wonderful time to visit as the skies are usually blue and bright!   Bhrigu Lake Bhrigu Lake Bhrigu Lake is a beautiful high-altitude lake located in Himachal Pradesh, India. It’s nestled in the Kullu district, not far from the famous town of Manali. The lake is situated at an altitude of about 4,300 meters (14,100 feet), which means you’ll be trekking high up in the mountains! This makes the scenery absolutely breathtaking, with snow-capped peaks all around and lush green meadows below. Special Spots Along the Trek As you make your way to Bhrigu Lake, you’ll discover some truly special spots that make this trek even more exciting: Gulaba: This is where … Read more

Rajgundha Valley Trek: The Ultimate Guide for Nature Lovers

Rajgundha Valley Trek

Rajgundha Valley Trek Overview: Everything You Need to Know Rajgundha Valley The Rajgundha Valley Trek is one of those hidden gems that combines natural beauty, easy trails, and peaceful surroundings. If you’re dreaming of trekking through the majestic Himalayas but want something off the beaten path, this is the trek for you. It’s perfect for beginners and experienced hikers alike, with plenty of stunning views, local culture, and adventure along the way. Let’s break it down so you’ll have everything you need to know before setting off. 1. Where Is Rajgundha Valley? Rajgundha Valley is tucked away in the Kangra district of Himachal Pradesh, India. It’s part of the Dhauladhar range in the Himalayas, known for its lush green valleys, forested trails, and panoramic mountain views. The trek offers a peaceful escape from the more crowded trekking spots like Triund or Manali. You won’t be battling big crowds, which makes the experience even more special. 2. How Long Is the Trek? The trek to Rajgundha Valley is fairly easy, covering about 12 to 15 kilometers in total, depending on your starting point. It typically takes 2 days, with one night spent camping or staying in homestays in the valley. Day 1: You’ll begin from Barot or Billing and trek about 8 to 9 kilometers to Rajgundha. Along the way, you’ll cross through beautiful forests and small streams. Day 2: From Rajgundha, you can trek another 5 to 6 kilometers, either toward Palachak or back to Billing, depending on your plan. This makes it ideal for those who are new to trekking or want a short, refreshing hike without the extreme challenges. 3. Starting Points: Barot or Billing? You have two options for where to start your trek: Option 1: Barot: Barot is a serene village nestled by the Uhl River, about a 4-hour drive from Dharamshala. The trek from Barot is slightly longer but gentler, following a beautiful path through forested hills. Option 2: Billing: If you’ve heard of Bir Billing for paragliding, you know it’s a popular adventure spot. Starting from Billing gives you an amazing head start at a higher altitude, and the trek to Rajgundha is shorter and a bit steeper, but manageable.   Best Time to Visit Rajgundha Valley summer 1. March to June: Spring to Early Summer (The Ideal Time) The spring to early summer months (March through June) are hands down the best time to visit Rajgundha Valley. As the snow melts from the winter months, the valley blooms with vibrant wildflowers, and the entire landscape is lush and green. The temperatures are mild, making it perfect for trekking, with daytime highs ranging between 15°C to 25°C (59°F to 77°F). The air is crisp, but not too chilly, so you’ll feel comfortable trekking all day.   2. July to September: Monsoon Season (Not Recommended) Rajgundha Valley gets a lot of rainfall during the monsoon season, which typically runs from July to September. Trekking during this time is not recommended due to the heavy rain, which can make the trails slippery and prone to landslides. The thick clouds also obscure the stunning views of the Dhauladhar range, which is one of the main reasons people come to Rajgundha in the first place.   3. October to November: Autumn (A Second Best) After the monsoon season, autumn brings clear skies, crisp air, and another excellent opportunity to explore Rajgundha. October and November are perfect months if you’re looking for cooler trekking conditions without the crowds. The skies are crystal clear, offering breathtaking views of the snow-capped Dhauladhar peaks. Temperatures during the day are comfortable, around 10°C to 20°C (50°F to 68°F), but nights start to get chilly, sometimes dropping below 0°C (32°F) in November.   4. December to February: Winter (Challenging but Rewarding) Visiting Rajgundha Valley in the winter is for more seasoned trekkers. From December to February, the valley is blanketed in snow, transforming it into a winter wonderland. If you love snow and don’t mind trekking in the cold, this season offers a completely different experience. The solitude and beauty of the snow-covered trails are unbeatable, but the temperatures can drop to -5°C (23°F) or lower at night.   How to Reach Rajgundha Valley 1. How to Get to Rajgundha Valley from Delhi From Delhi, you have multiple travel options to reach Rajgundha Valley, but all routes lead through Bir or Barot, the main access points to the valley. By Road: Delhi to Bir: You can drive or take a bus from Delhi to Bir, which is about 500 kilometers. If driving, it will take roughly 10-12 hours, depending on traffic. The NH44 route via Ambala and Una is the most straightforward, though you can also travel via Chandigarh. Bus: If you’re taking the bus, look for overnight Volvo buses that leave from ISBT Kashmiri Gate in Delhi to Bir or Baijnath. The buses are comfortable and drop you close to your destination. Once in Bir, it’s just a short 1-2 hour drive to the trek starting point. By Train: Take a train from New Delhi Railway Station to Pathankot. From Pathankot, it’s another 4-5 hour drive to Bir. You can hire a taxi or take a local bus from Pathankot to Bir. While the train journey takes longer (about 10-12 hours), it’s scenic and comfortable. By Air: The nearest airport to Rajgundha is Gaggal Airport in Dharamshala, which is about 2-3 hours from Bir by taxi or bus. Flights from Delhi to Dharamshala are frequent and take about 1.5 hours. Once in Dharamshala, you can hire a taxi or take a bus to Bir and begin your journey toward Rajgundha. 2. How to Get to Rajgundha Valley from Manali Manali is a popular starting point for many treks in Himachal Pradesh, including Rajgundha. By Road: The easiest way to reach Rajgundha from Manali is by taking a taxi or bus to Barot. The journey will take about 5-6 hours and passes through scenic mountain roads. From Barot, the trek to Rajgundha is … Read more

How To Get Hampta Pass Permit

Hampta Pass Permit

Why Do You Need a Permit for Hampta Pass? Hampta Pass If you’re planning to trek Hampta Pass, a permit is more than just a formality—it’s actually really important for a few reasons. First off, it helps local authorities keep track of the number of trekkers on the trail. This matters because Hampta Pass is part of a sensitive ecosystem, and controlling the foot traffic helps prevent damage to the environment. Another reason is safety. The permit system allows officials to know who’s out on the trail, which can be helpful in case of emergencies, like sudden weather changes or injuries. Plus, it ensures that only those who are properly prepared (both physically and logistically) are attempting the trek. Finally, the permit also supports the local communities and maintenance of the trail. Fees collected from permits often go toward maintaining the route, keeping it accessible, and preserving the natural beauty of the area for future trekkers. So, in short, getting a permit isn’t just about following the rules—it’s about keeping Hampta Pass safe and stunning for everyone!   Where to Apply for a Hampta Pass Permit Applying for a Hampta Pass permit is pretty straightforward, but knowing where to go saves you a lot of hassle. There are two main ways to get your permit—online or in person. If you’re the kind of person who loves to plan everything ahead, online is probably your best bet. You can apply through the Apply Permits Online. They’ve made it pretty simple, and you’ll just need to fill out the necessary details and submit your documents. However, if you prefer to do things in person or didn’t get a chance to apply online, you can visit the Forest Office in Manali. This is the go-to spot for many trekkers to grab their permits. The office is located near Mall Road, so it’s easy to find if you’re already in town. Just make sure to carry all your required documents with you, like your ID and passport-sized photos. Also, keep in mind that if you’re going through a trekking agency, they often handle the permit process for you. So, check with them before you start stressing about paperwork. Hampta Pass Permit Cost: What to Expect Cash When it comes to the cost of a Hampta Pass permit, you can breathe a little easier—it’s quite affordable. The permit usually costs around ₹150-₹250 per person. This fee covers forest department charges and other trekking-related permissions. Keep in mind, the exact cost might vary slightly depending on the season or any updates from local authorities. If you’re trekking with a tour operator, they’ll likely include the permit cost in the overall package, which makes things easier. But if you’re planning to go independently, you’ll need to handle the permit yourself. Just remember to check the latest rates ahead of time, as they can change unexpectedly. Also, don’t forget to carry some extra cash when you’re collecting your permit, just in case there’s a slight difference in the fee or any additional charges that pop up at the last minute. Documents Required for the Hampta Pass Permit When you’re applying for the Hampta Pass permit, you’ll need to gather a few key documents. Don’t worry, it’s pretty straightforward! Here’s a quick list of what you should have ready: Government-Issued Photo ID – You’ll need something like your Aadhaar card, driver’s license, passport, or voter ID. It should clearly show your name and photo. Passport-Sized Photographs – Carry a couple of recent passport photos with you. Some authorities may ask for this when you apply in person. Medical Fitness Certificate – Since Hampta Pass is a high-altitude trek, you’ll need a medical certificate confirming that you’re physically fit for the trek. You can get this from a doctor, and it’s usually just a basic health check-up. Trekking Itinerary – In some cases, authorities might ask for your trekking plan, including dates and the route. It’s helpful to have a rough outline of where you’ll be and when. Consent Form (for Minors) – If you’re under 18, you might need a consent form signed by a parent or guardian, so keep that in mind.   What Happens if You Trek Hampta Pass Without a Permit? So, you’re all set for an adventure at Hampta Pass, but you’re wondering, “Do I really need that permit?” The short answer is yes, and here’s why you don’t want to skip it. First off, trekking without a permit is illegal. If you’re caught by the authorities (and they do patrol the area), you could face hefty fines. Nobody wants to ruin their epic journey with a financial setback, right? But it’s not just about the money. Trekking without a permit can also put your safety at risk. The permit system is in place to manage the number of trekkers and ensure that the trails remain safe and well-maintained. Without it, you might find yourself on an overcrowded path, which can lead to accidents or issues with navigation. Additionally, if you encounter any emergencies—like injuries or bad weather—being without a permit could complicate rescue efforts. Authorities may hesitate to assist those who aren’t following regulations, leaving you in a tough spot. Lastly, think about the impact on the environment. The permit system helps to protect the natural beauty of Hampta Pass, allowing future generations to enjoy it as much as you do. When everyone follows the rules, it contributes to conservation efforts and keeps the area pristine. In short, getting a permit isn’t just a bureaucratic hurdle; it’s an essential part of ensuring a safe, enjoyable, and responsible trek. So make sure to get yours before you hit the trail! Conclusion Getting a permit for the Hampta Pass trek is essential for several reasons. It helps protect the sensitive ecosystem by managing the number of trekkers, ensuring that the natural beauty of the area remains intact for future visitors. Safety is also a key factor; the permit system allows authorities to monitor who is … Read more

How to Reach Havasu Falls Without Hiking

How to Reach Havasu Falls Without Hiking

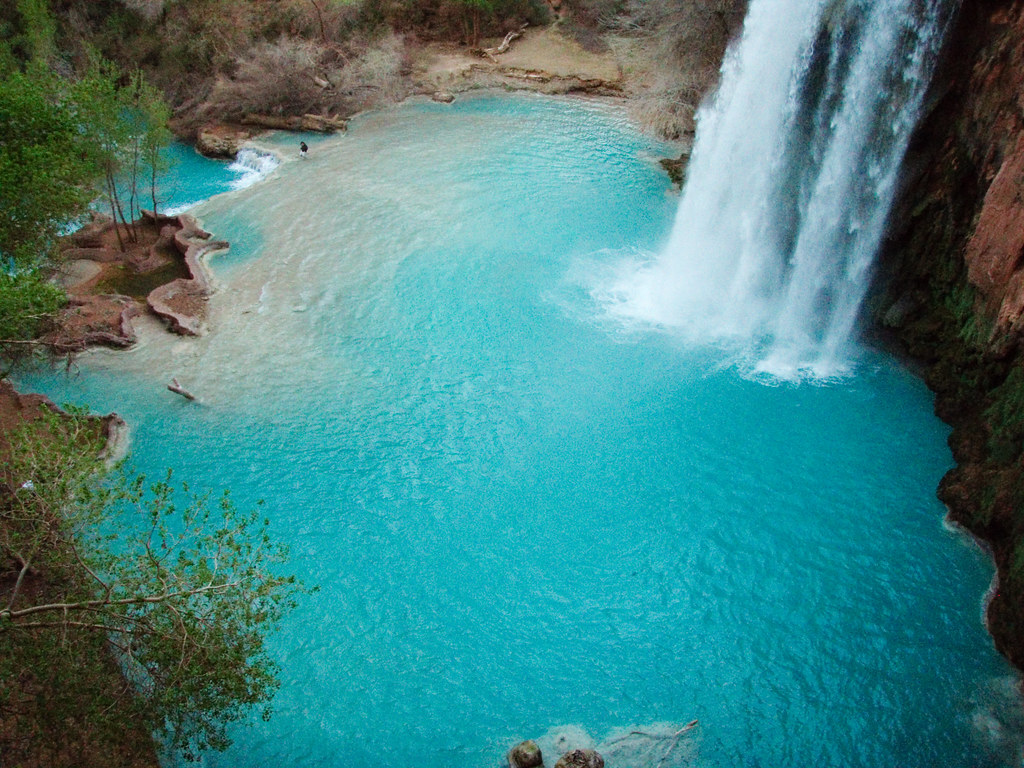
Visiting Havasu Falls is a dream for many, but the idea of hiking 10 miles through rugged terrain might feel overwhelming. If you’re not a fan of long hikes or simply looking for an easier way to experience the stunning beauty of this iconic waterfall, there’s good news—you can get to Havasu Falls without hiking! But, like any good adventure, it comes with a few twists. From hopping on a helicopter to horseback rides, there are several ways to bypass the hike and still soak in the magic of Havasu Falls. However, there’s more to know than just showing up and flying in. Timing, availability, permits, and costs all play a role in making this trip a success. Let’s dive into the details so you can plan your unforgettable, hike-free journey to one of the most beautiful waterfalls in the world! Is It Possible to Visit Havasu Falls Without Hiking? Yes, you can get to Havasu Falls without hiking, but there’s a catch—it’s not quite as straightforward as just showing up and flying in. Here’s the scoop: If hiking the 10 miles to Havasu Falls sounds too tough or just not your thing, there’s an alternative: helicopter rides! You can hop on a helicopter from Hualapai Hilltop (where the trail begins) and fly right into Supai Village, which is only 2 miles from Havasu Falls. havasu falls Sounds easy, right? Well, there are a few things to keep in mind: Helicopter Availability: Helicopters don’t run daily. They typically fly only a couple of days a week, and even then, it’s first come, first served. Be prepared to wait, as the locals in Supai Village have priority over tourists. Get There Early: You’ll want to arrive early to get a spot in line, as the helicopters can fill up fast. There’s no way to reserve ahead of time, so it’s all about showing up and waiting your turn. Costs: The helicopter ride costs around $85 to $100 per person one way, but it’s a big time and energy saver if hiking isn’t your thing. Permits: Whether you hike or fly in, you still need a permit to visit Havasu Falls, so make sure to get one before your trip. No permit means no entry, even with a helicopter ride! Helicopter Rides to Havasu Falls: What You Need to Know Helicopter If you’re looking to skip the long hike to Havasu Falls, a helicopter ride is a great option! The helicopter service runs between Hualapai Hilltop and Supai Village, which is about two miles from the falls. Here’s everything you need to know to make the trip a breeze: When Do Helicopter Rides Operate? The helicopters don’t fly every day, so it’s important to plan ahead. They usually operate on Thursdays, Sundays, and some Mondays during the busy season (spring through fall). Flights are weather-dependent, so keep an eye on the forecast. First Come, First Served Helicopter rides are on a first-come, first-served basis. This means you’ll want to get to Hualapai Hilltop early in the morning to secure a spot. Local Havasupai tribe members have priority, so expect to wait in line even if you’re there early. How Much Does It Cost? The cost for a one-way helicopter ride is usually around $85 per person. You can pay for your ticket when you arrive, but having cash on hand is a good idea, just in case. What’s the Ride Like? The ride itself is short—about 8 minutes—and offers stunning views of the canyon as you fly in. It’s definitely a thrilling way to see the area without breaking a sweat! You’ll land in Supai Village, and from there, it’s just a couple of miles to the falls, which you can either hike or arrange for a mule ride. How to Book You can’t reserve a helicopter ride in advance, so it’s all about showing up early and being patient. If you’re planning to fly back out, make sure to stay flexible with your timing, as the helicopter can fill up fast. Permits Are Still Required Even though you’re flying in, you’ll still need a permit to visit Havasu Falls. Permits are hard to get and must be booked months in advance. Make sure you secure one before heading out. Alternative Ways to Reach Havasu Falls (No Hiking Required) Horseback Ride If you’re looking for ways to reach Havasu Falls without hiking, the helicopter isn’t your only option—though it’s the most popular. Let’s dive into some practical alternatives to get there without breaking a sweat. Helicopter Rides: As mentioned before, this is by far the most convenient way to skip the hike. Helicopter services fly between Hualapai Hilltop and Supai Village, and from there, it’s just a short two-mile walk to Havasu Falls. The key thing to remember is that flights don’t operate daily, so check the schedule and get there early, as it’s first come, first served. Pack Mule Transport: While this option doesn’t get you out of hiking, it’s helpful if you don’t want to carry heavy gear. You can hire a pack mule to carry your bags down to Supai Village, making your hike much lighter and easier. But if you’re set on not hiking at all, this isn’t a full solution for avoiding the trek. Horseback Ride: Another way to reach Havasu Falls is by horseback! There are horses available for rent, and you can ride down the trail from the Hilltop to Supai Village. While this avoids hiking, horseback riding can be bumpy and isn’t for everyone. It does give you a unique experience of the canyon, though. Chartered Tours: Some travel companies offer guided tours that might include helicopter transport or other assistance to help you get down to the falls. These tours can take care of logistics and might offer added comfort, but you’ll need to check with the tour provider to ensure they offer non-hiking options. ATV (not available): Though some might wonder about riding ATVs or similar vehicles down the trail, that’s … Read more